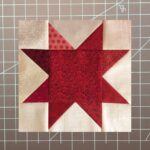
This easy no waste flying geese method will save you time and fabric! Make four flying geese quilt blocks at a time with this super easy technique!
I love flying geese blocks! Fall is my favorite season in Wisconsin. And these blocks remind me of fall when the geese are flying in a vee overhead! They also take me back to when I taught fourth grade and did a day long lesson on the poem “Something Told the Wild Geese” every October. Great memories!
There are so many ways to use Flying Geese blocks in your quilts!
They make an awesome quilt border around or within a quilt!
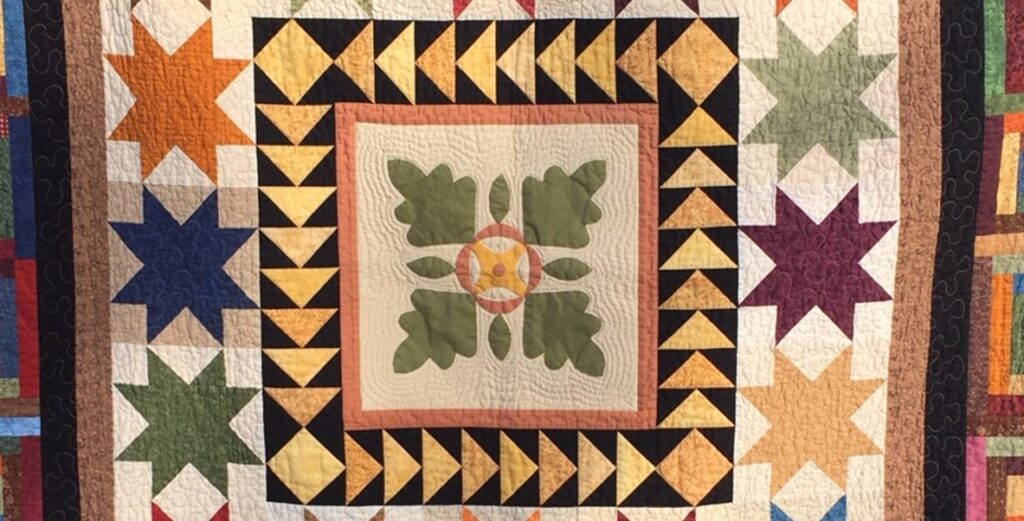
And many quilt blocks use flying geese to make up the design! Flying geese blocks also are so cute when they’re incorporated into a quilt block. They can point the way like an arrow or pivot to instruct your eye to move about the quilt.
So many times you’ll need four or more flying geese at a time. And this method makes four flying geese!!! You will definitely make more quilts with this block when you learn how to make easy no waste flying geese!!!
Post contains affiliate links and we earn commissions if you shop through the links on this page. For more information please read the disclaimer on the Privacy Policy page.

Get the Creative Grids Ultimate Flying Geese Tool to easily trim your flying geese to size!
Cutting the Squares for the Easy No Waste Flying Geese
So many quilting techniques have you cut pieces, sew them together, then cut them apart and sew them together again. These types of methods save time and fabric! And they make quilting easy!!!
This easy no waste flying geese technique also uses the cut, sew, cut, sew method!
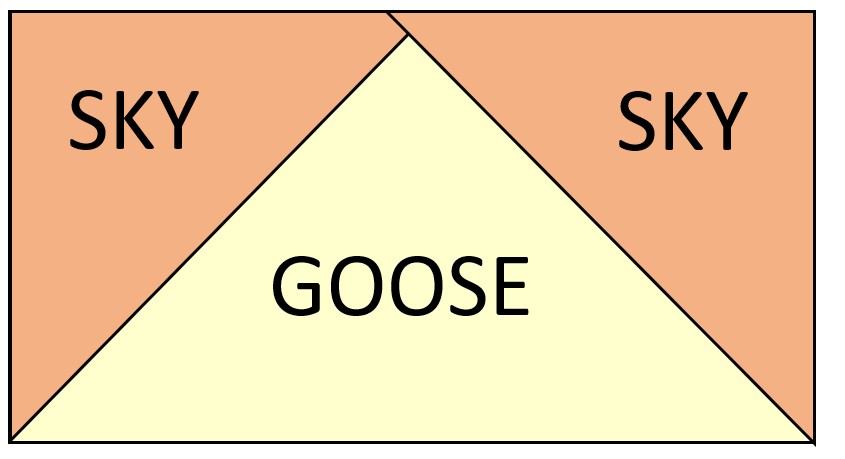
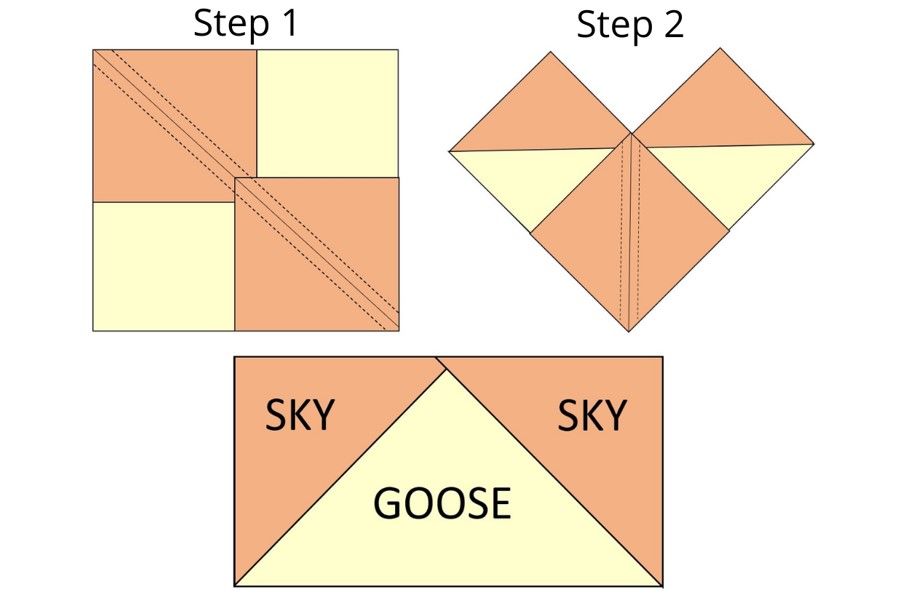
The large triangle on a flying geese quilt block is the goose! And the two smaller triangles on either side of the goose are the sky.
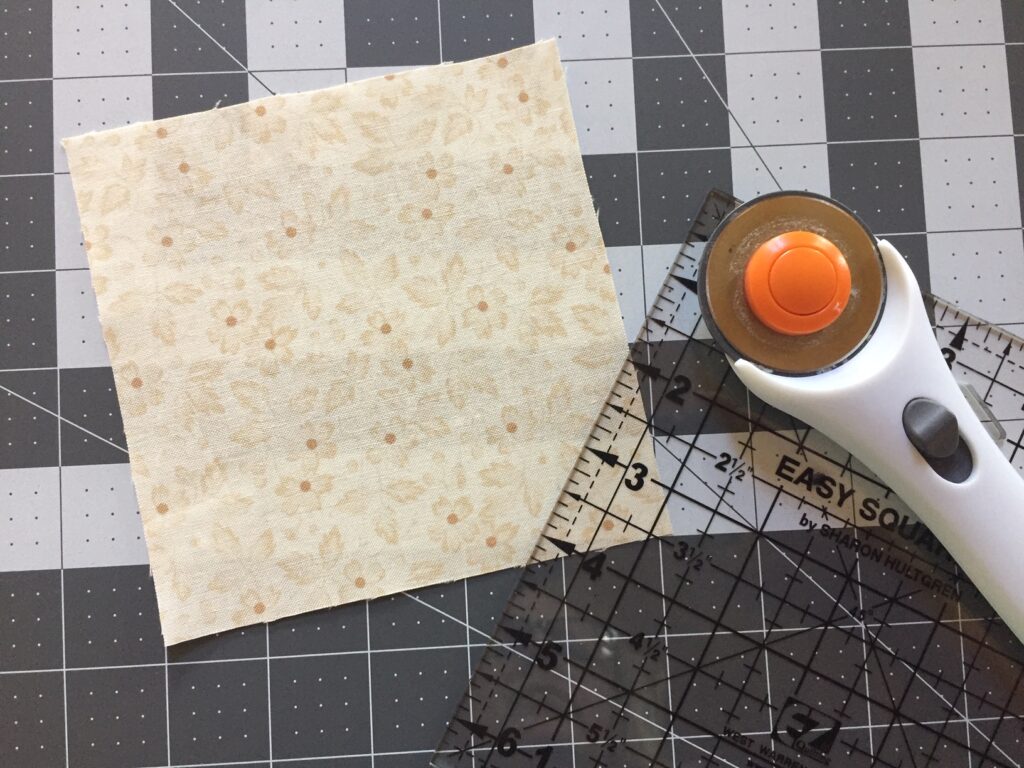
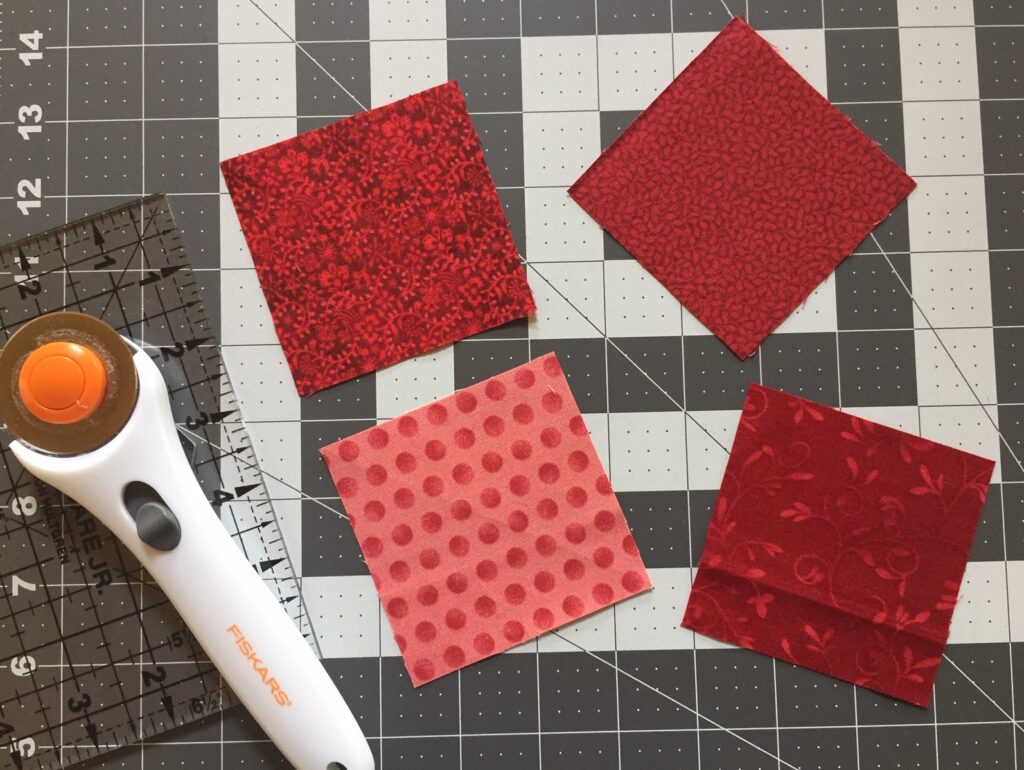
Cut one large square that will make up the goose sections. Cut four smaller squares that will make up the sky sections.
This chart shows a few of the common sizes to cut depending on the size of quilt block you need!
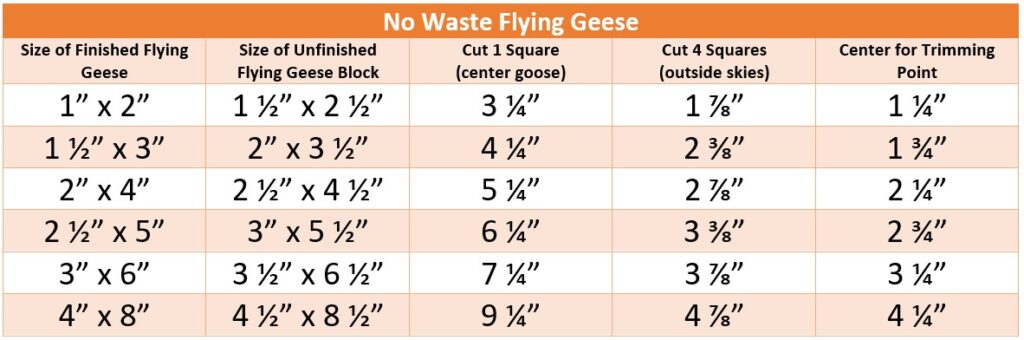
For more sizes you can download a PDF diagram here:
Step 1: Sewing Two Small Squares Onto the Large Square
Using a fine pencil and a straight edge draw a diagonal line from corner to corner on the back of each of the four small squares.
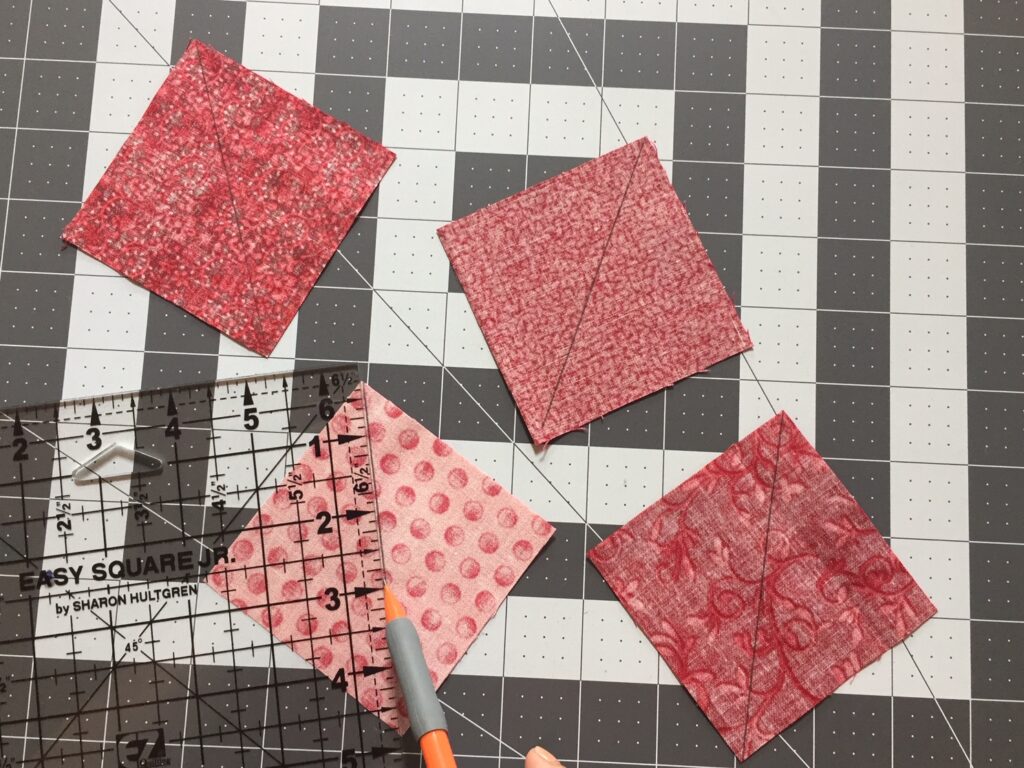
Align two small squares onto opposite corners of the large square with the right sides together. The diagonal line is facing up.
The two small squares will overlap just a little bit in the middle. Pin them in place.
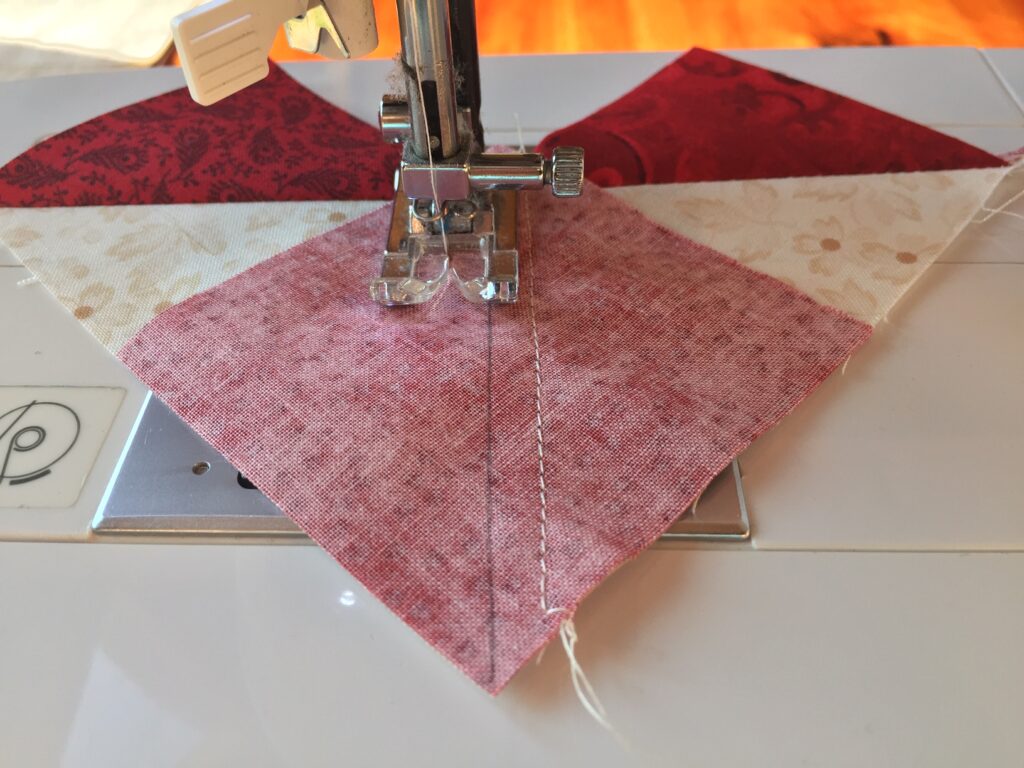
Sew a scant ¼” seam on each side of the diagonal lines. A scant seam is just a little less than ¼”. Find your ¼” seam placement on your presser foot and move your fabric just a little closer to the needle (a little less than 1/8 ”) to sew the “scant” ¼” seams.
Remove the pins as you come up to them. Don’t forget to sew a scant ¼” seam on BOTH sides of the line!
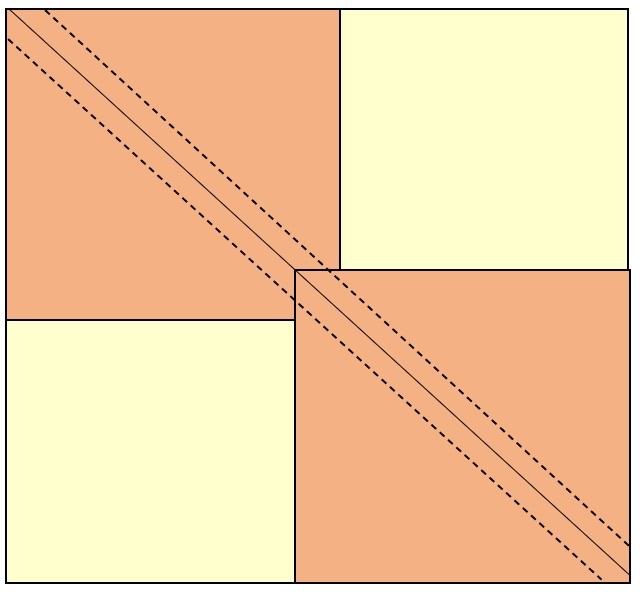
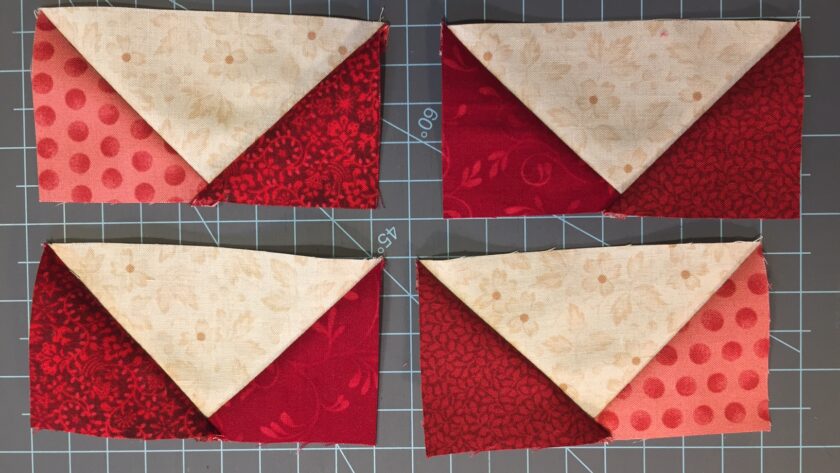
Cut apart on the drawn line to separate into two units. You can use either a rotary cutter or carefully cut with a scissors to separate into two units. I prefer to just cut them apart with a scissors, but I make sure I am careful to cut directly on the line!!
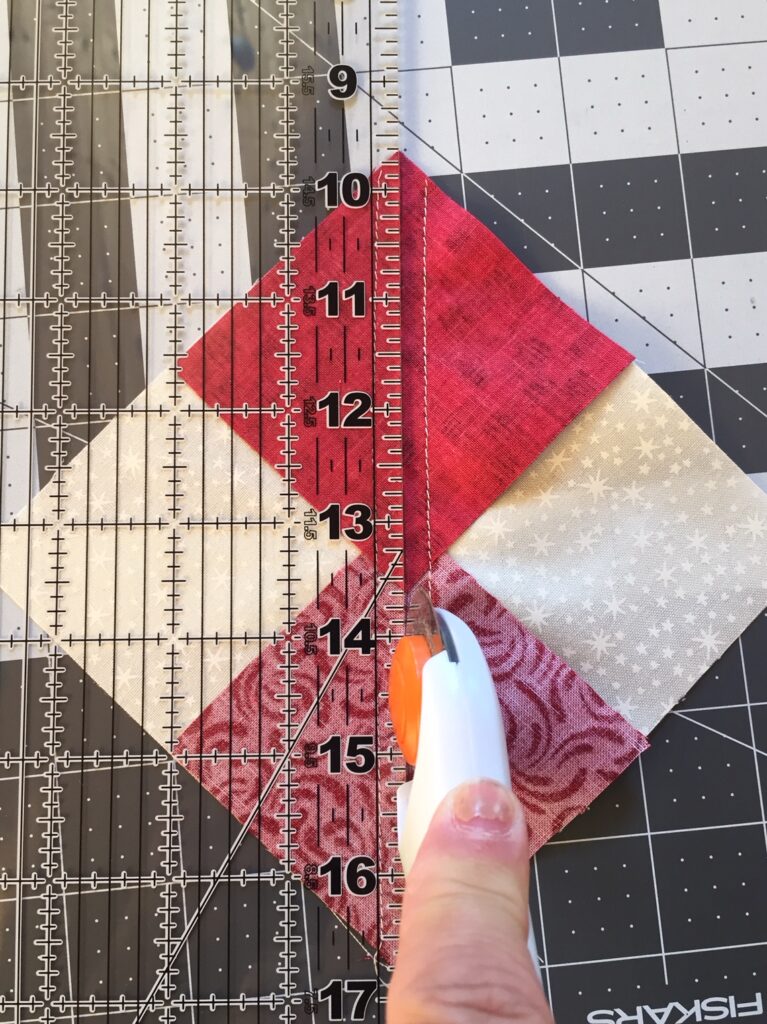
Press each of the units open toward the small “sky” pieces.
Step 2: Sew a Small Square Onto Each of the Two Units
For each of the two units align a small square onto the “free” corner with the right sides together. The diagonal line is facing up.
Sew a scant ¼” seam on each side of the diagonal lines.
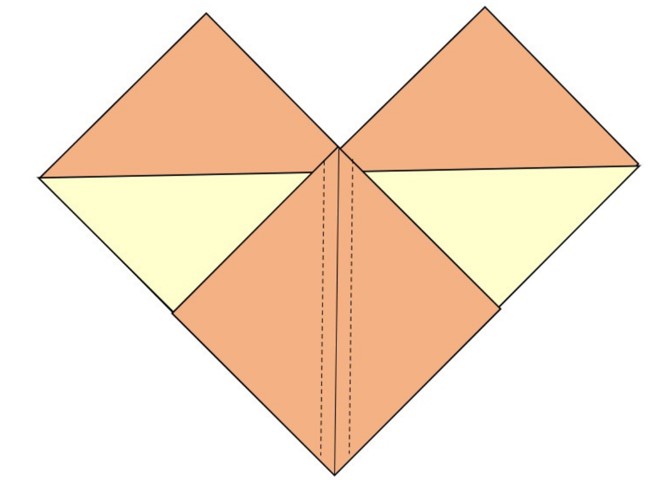
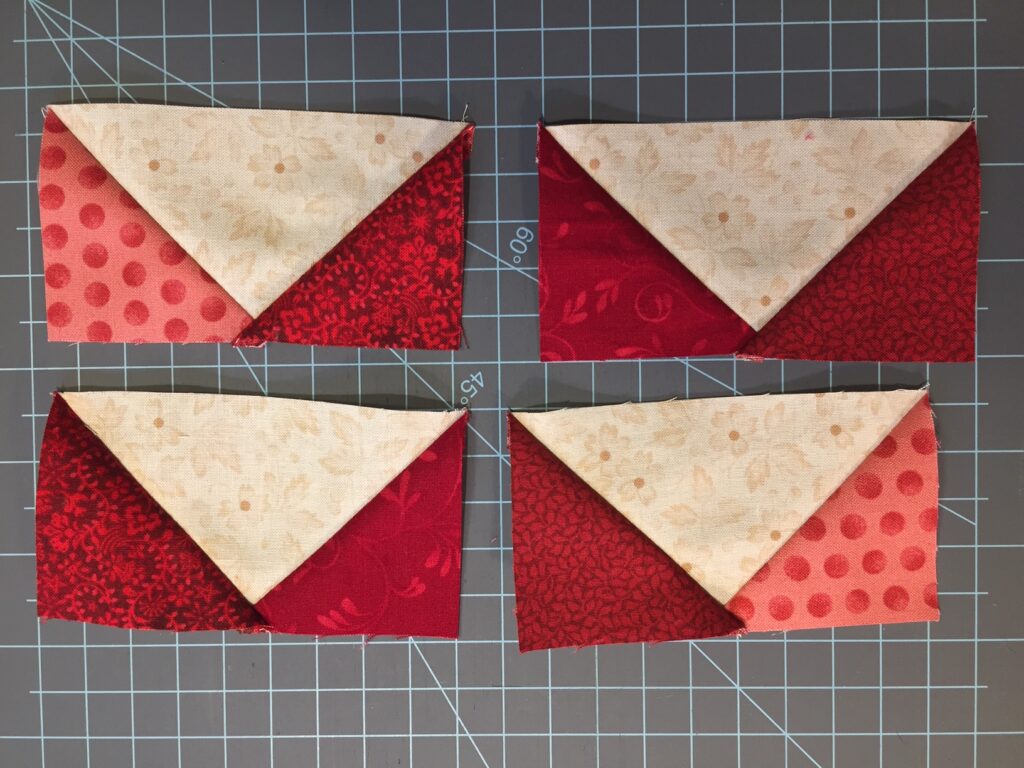
Cut apart on the drawn line of each unit to separate into four flying geese!
Press the flying geese open toward the small “sky” pieces.

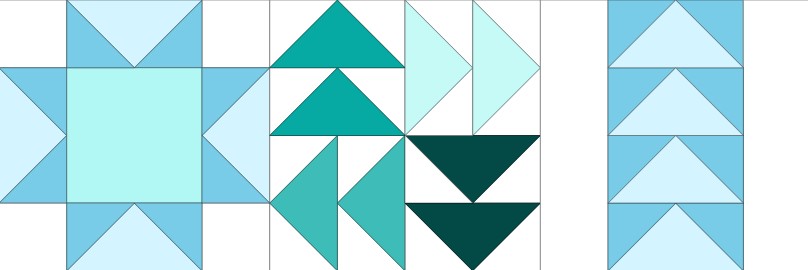
Here is another illustration of these steps:
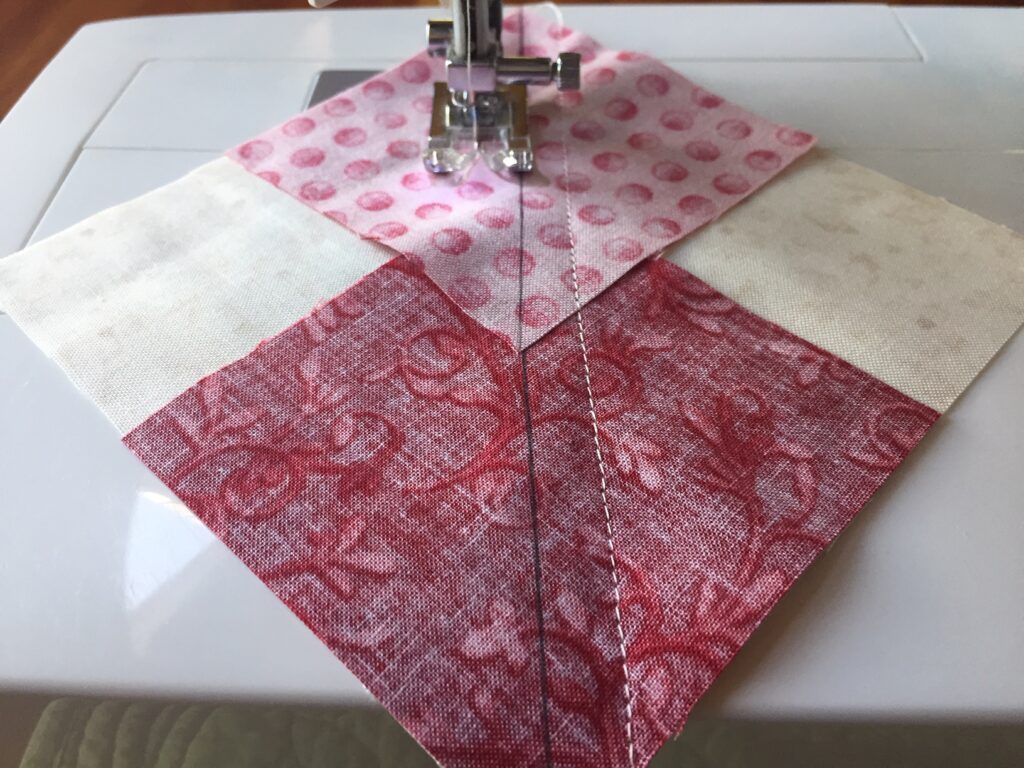
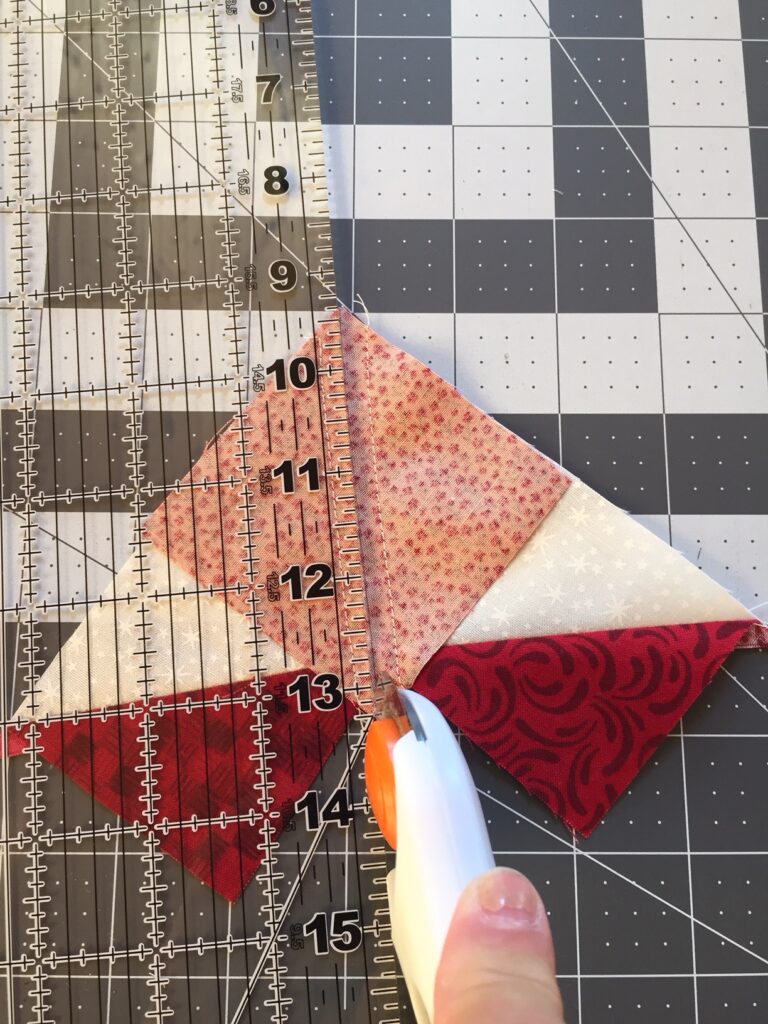
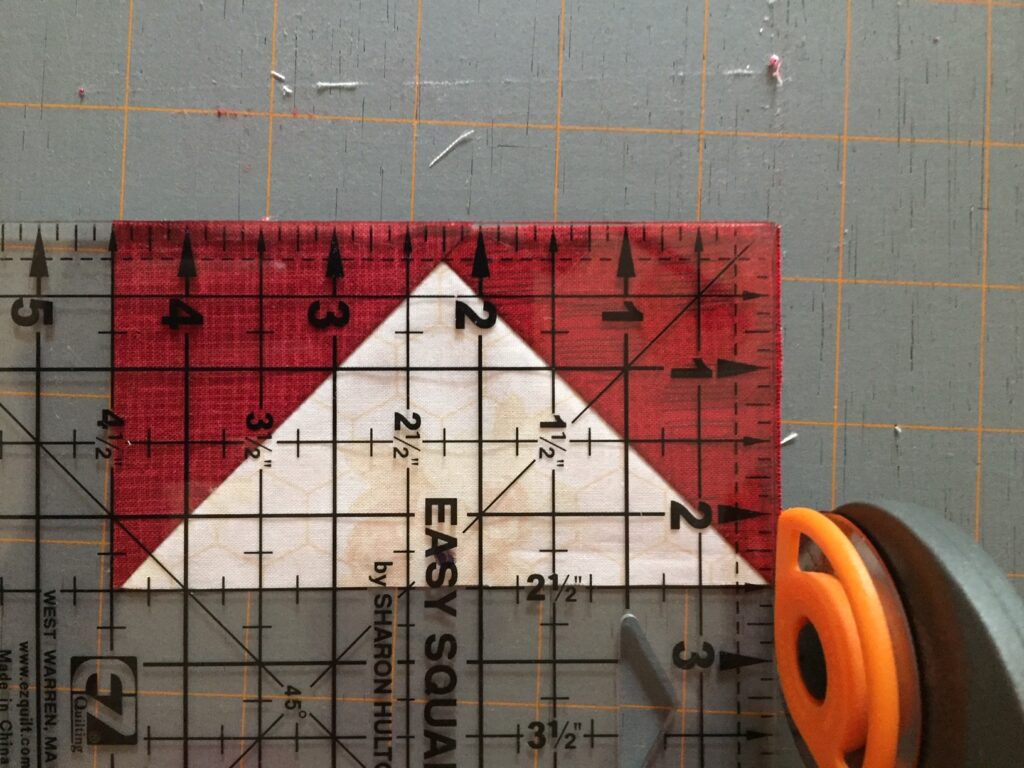
Trimming the No Waste Flying Geese
The flying geese blocks may need a little trim to get them to measure the size you need. Use a small ruler like the Easy Square, Jr. to trim the easy no waste flying geese.
To do this find the line on the ruler that measures ½ of the total width of your block.
For example, if your unfinished flying geese block needs to measure 2 ½” x 4 ½” find the line on the ruler that is half of 4 ½. This will be the 2 ¼” line!
Have the flying geese block with the “V” of the goose pointing down. Line up the ½ width line (in this case the 2 ¼” line) to the “V” of the goose. Then at the same time line up the 45 degree line to the right seam of where the sky meets the goose.
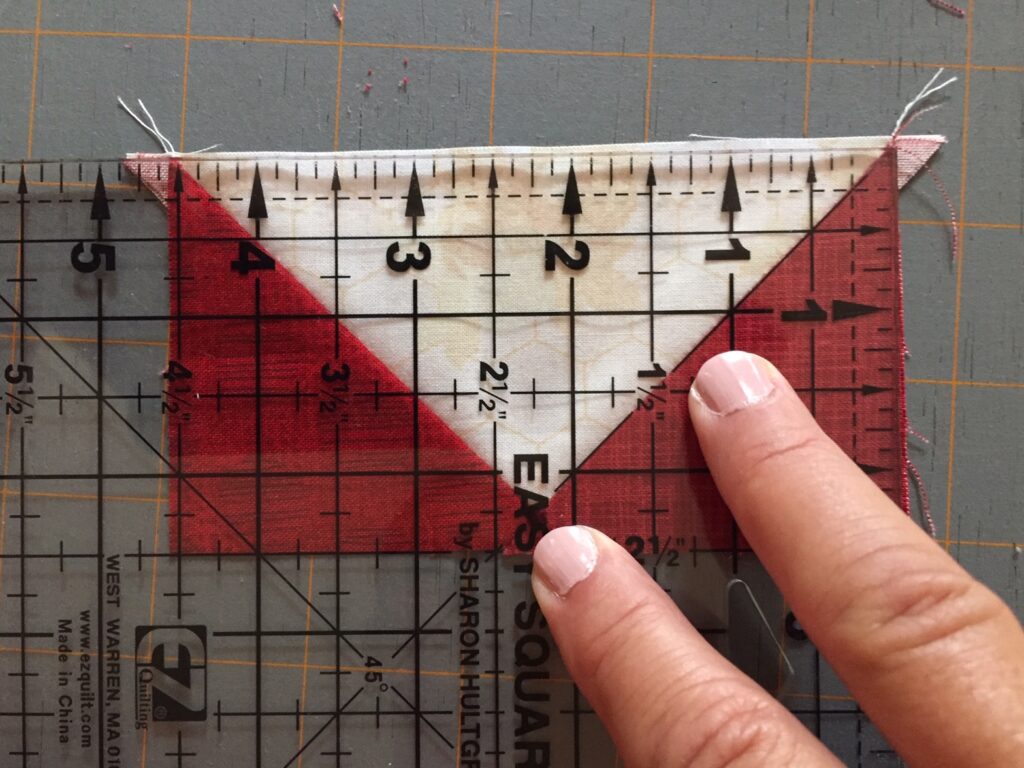
Trim the right and top sides of the block. This will be very minimal if anything at all that needs to be trimmed off.
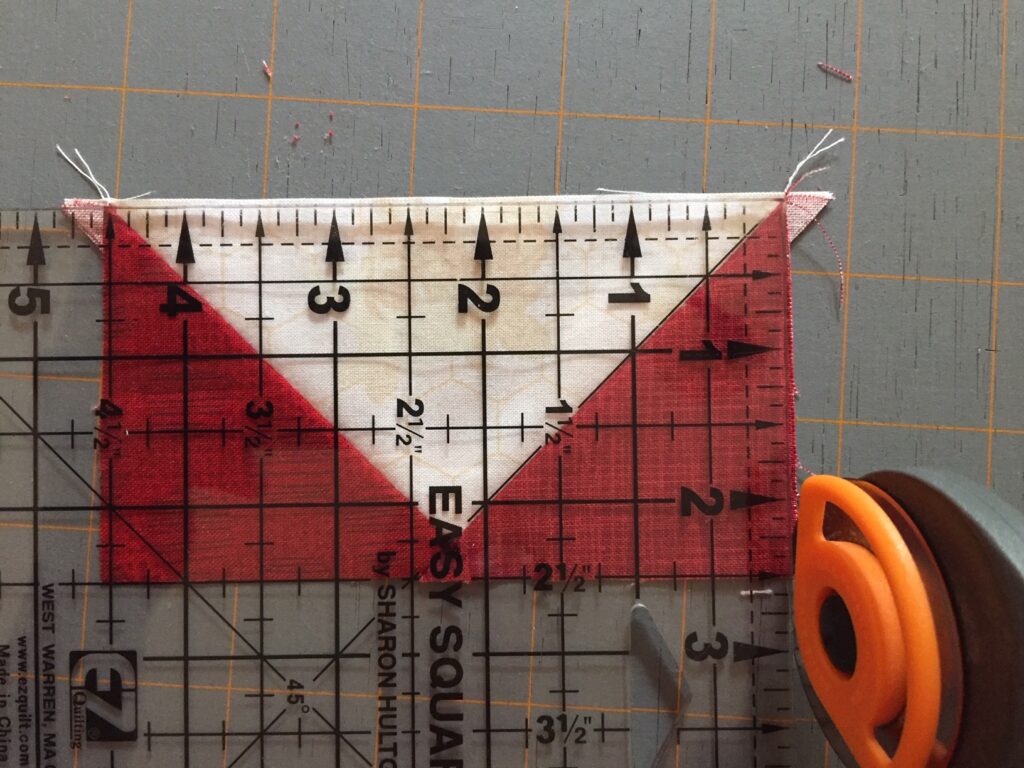
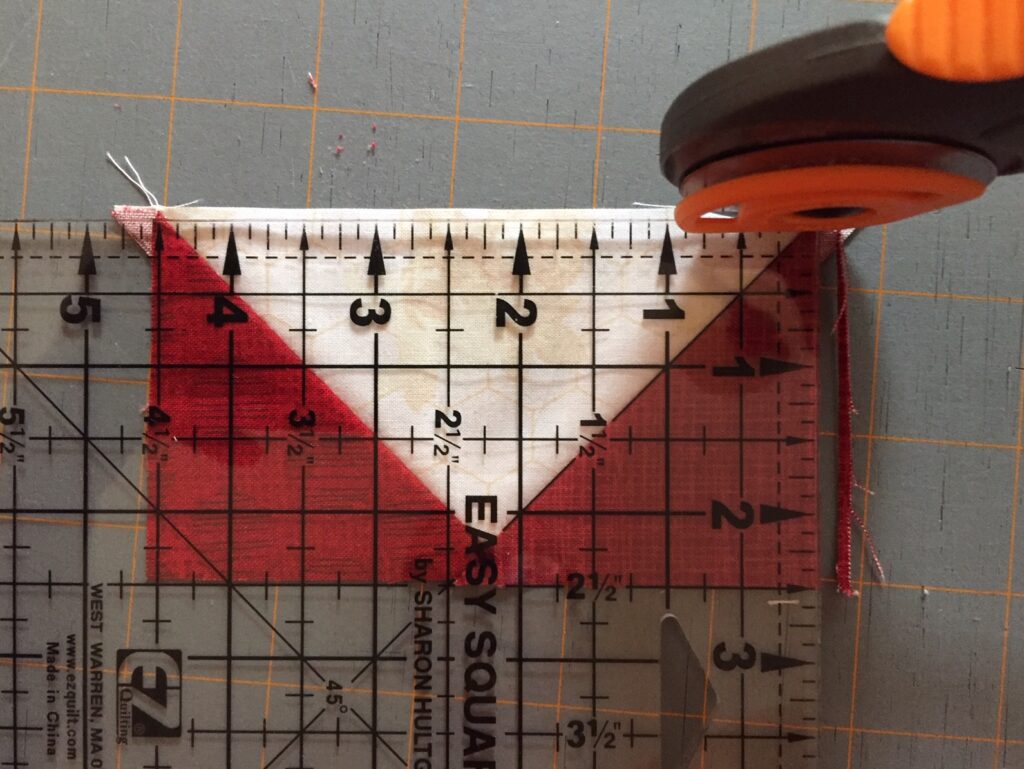
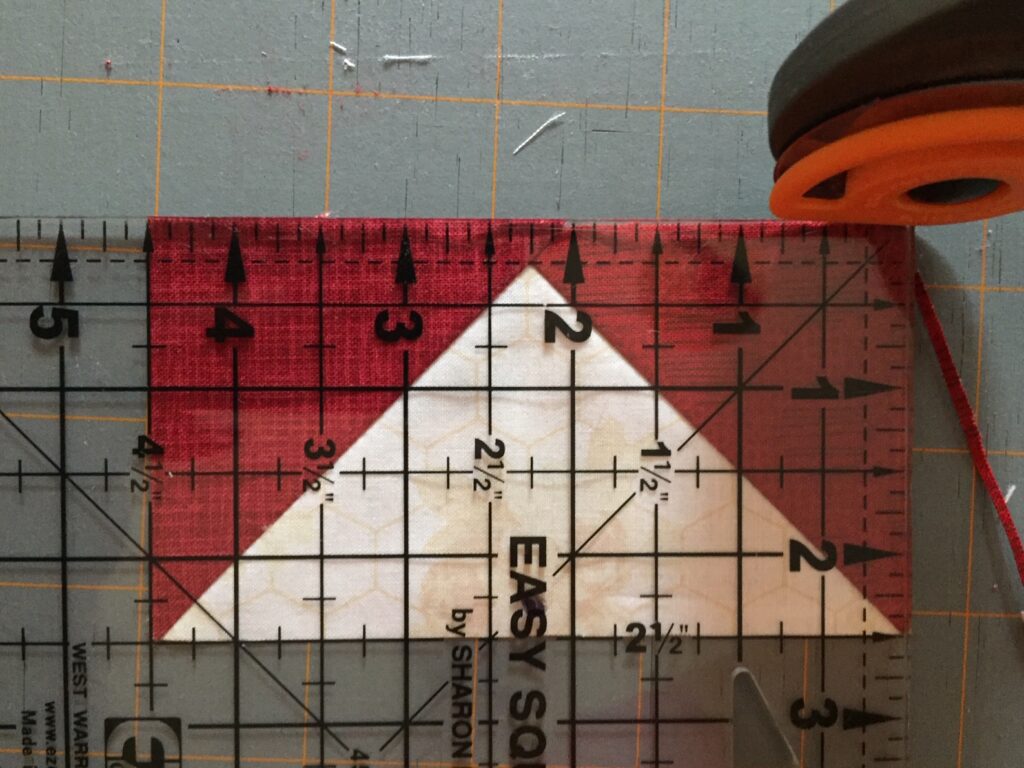
Now rotate the block so the “V” of the goose is pointing up. Line up the two trimmed lines to the lines on the ruler that equal the size the block needs to be. In this case it’s the 2 ½” and the 4 ½” lines.
Trim the right and top sides of the block if there is any overhang at all. This will be minimal if anything!
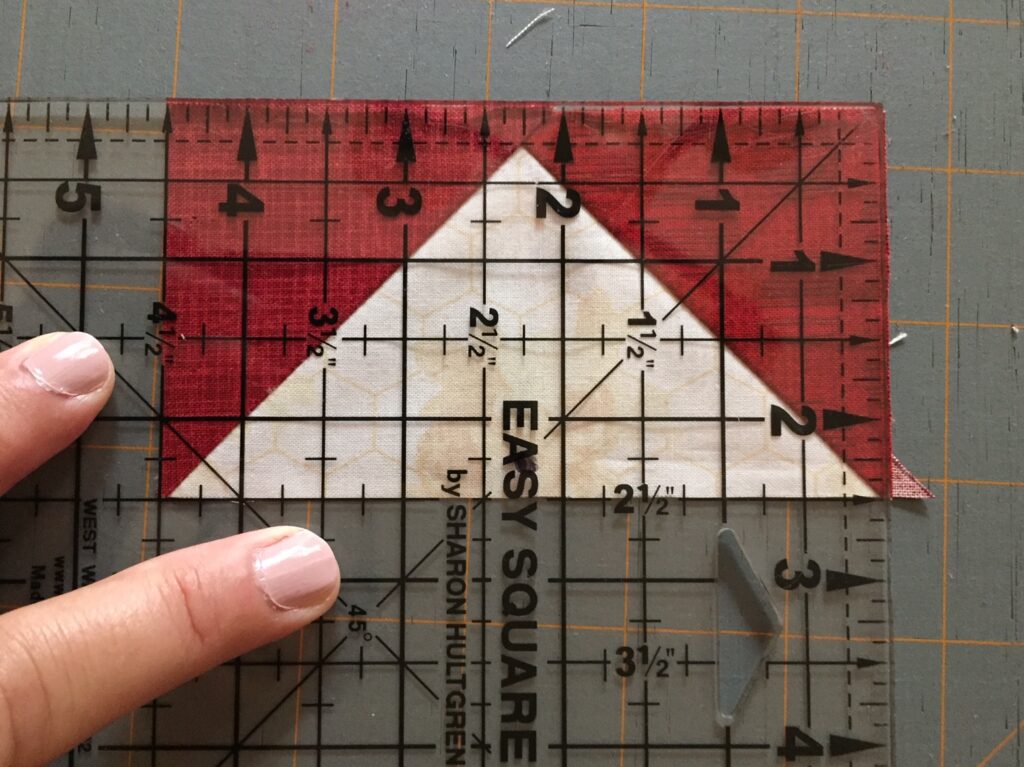
That’s it! Four quick, fun, and easy no waste flying geese quilt blocks are ready for you to incorporate into your next quilt or quilt block.
Here is a video tutorial How to Make No Waste Flying Geese Quilt Blocks!
Happy quilting!!!
~Bonnie

This makes so much sense, thanks for sharing.
I’m glad you found the post helpful! It’s such a great way to make 4 flying geese blocks at a time!! =)
[…] to the Easy No Waste Flying Geese Block post on how to sew the four flying geese needed for this […]
[…] Flying Geese, Four Patch, Square in a Square, and Quarter Square Triangle quilt blocks will be a snap to make […]