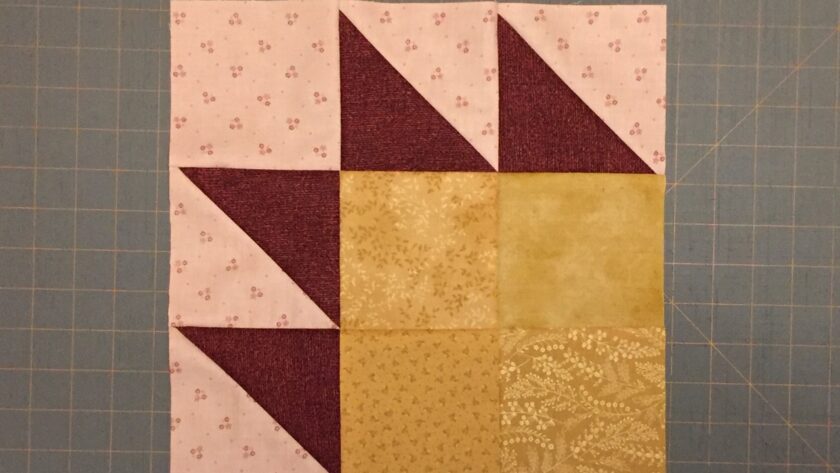
Learn how to sew a Bear Paw Quilt Block during week 4 of our Spring Block of the Week! This week’s block uses squares and half square triangles. The Bear Paw Quilt Block is so fun and easy to make!!
During Week 1 of this Spring Block of the Week series I discussed planning the colors for your quilt blocks. If you aren’t sure what color to make your Bear Paw Quilt Block take a peek at that previous post!
Post contains affiliate links and we earn commissions if you shop through the links on this page. For more information please read the disclaimer on the Privacy Policy page.
Week 4 – Bear Paw Quilt Block
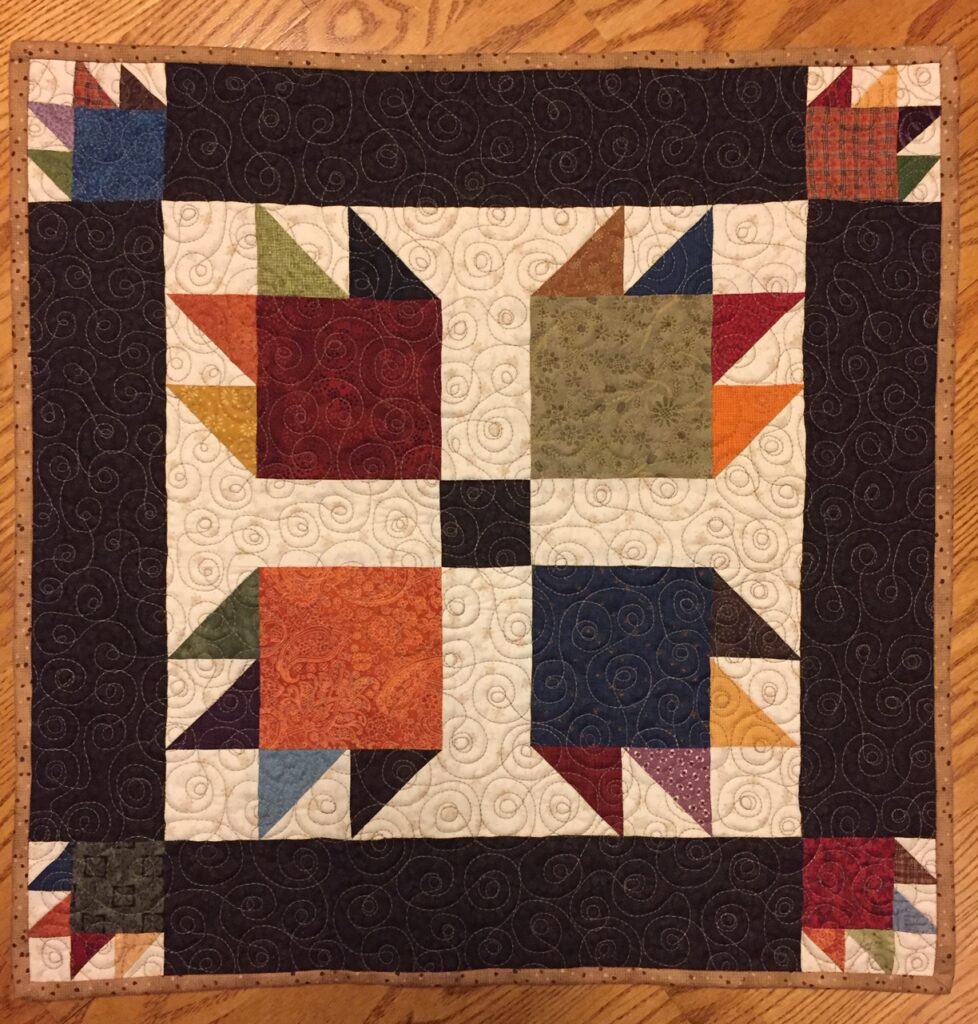
I’ve talked in the past of how the Bear Paw Quilt Block is one of my favorites!! Check out my “Barefoot” quilt pattern I designed using Bear Paw Quilt Blocks!!
The little bear toes are what get me every time! They’re just so darn cute!!!
The finished block will measure 12 ½” x 12 ½” square.
Sew using a ¼” seam allowance throughout.
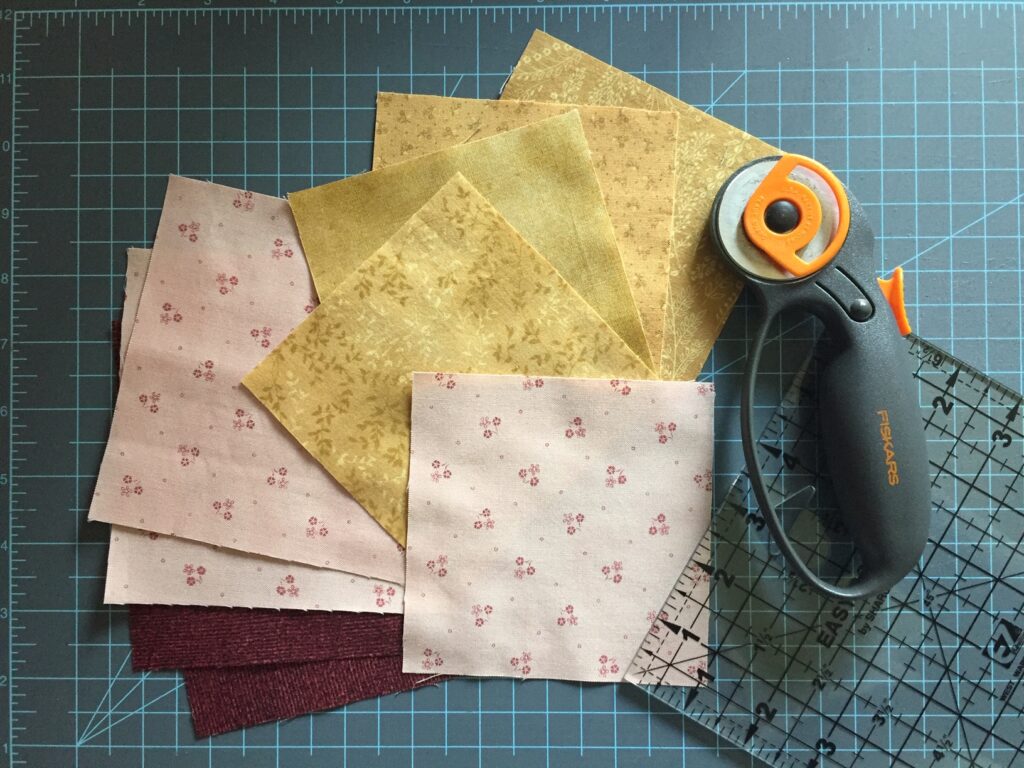
Cut the fabric for the block…
Cut one 4 ½” square of light-colored fabric and four 4 ½” squares of medium-colored fabric.
Also cut two 5 ¼” squares of the same light-colored fabric. Finally, cut another two 5 ¼” squares of dark-colored fabric. The 5 ¼” squares will be used to make the half square triangles!
You can also flipflop these colors for a different contrast than mine!!
If you’re new to quilting or cutting squares for quilts, you can take a peek at my post on using a rotary cutter or the post on basic quilt supplies!
Making the Half Square Triangles…
Use the light and dark 5 ¼” squares, right sides together, to make the half square triangles. Draw a diagonal line on the wrong side of the light squares. Sew 1/4″ on either side of the diagonal line, cut apart, press, and trim to measure 4 ½”.

For a refresher on making a half square triangle, visit my post of the Week 2 Shoofly Quilt Block!
Plan the block layout…
Follow this diagram to plan the layout of the half square triangle squares and the other 4 ½” squares.
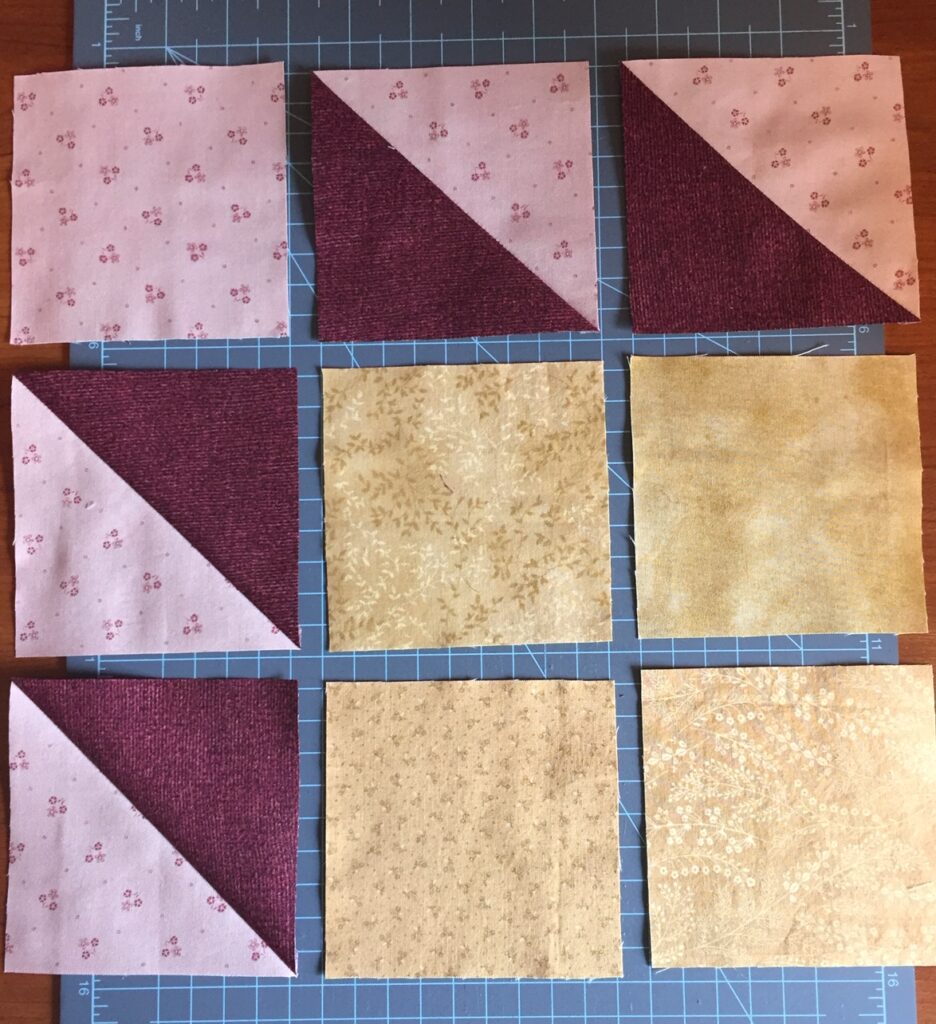
It might sound very simplistic, but sometimes I actually take a picture of the planned-out blocks so I don’t mess up when I start sewing them together. Then I can refer to the picture to help me get all the blocks in the right order!!
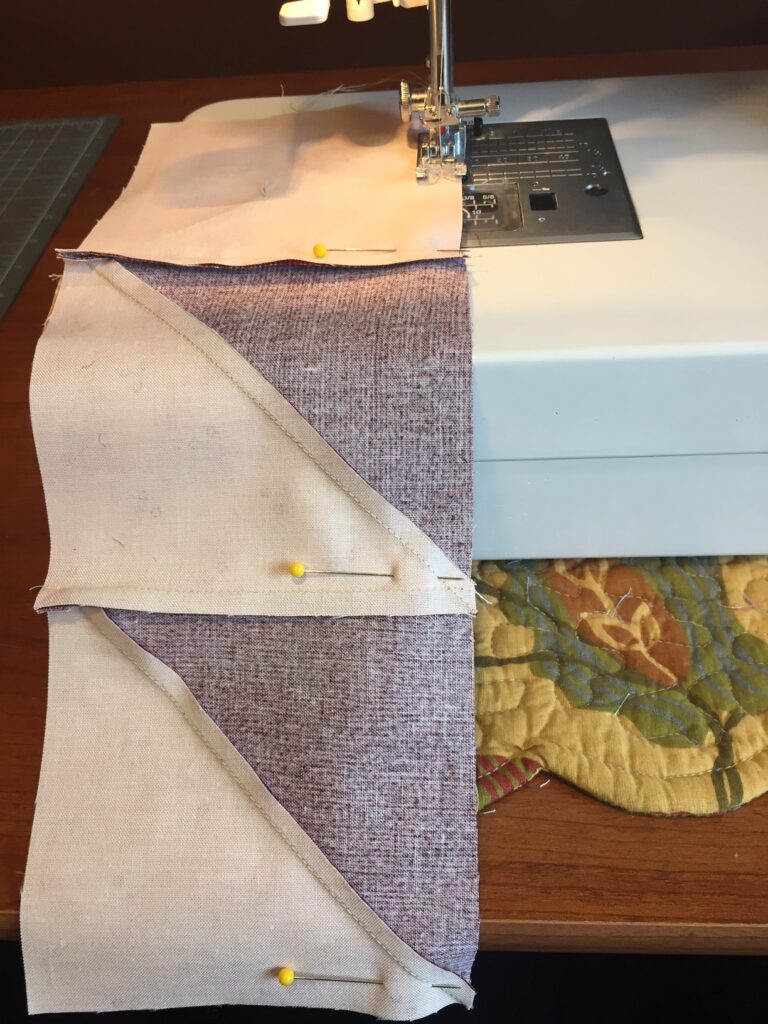
Sew together the squares of each row…
Begin sewing the squares together row by row. I like to pin the first two blocks in each row before I start sewing them.
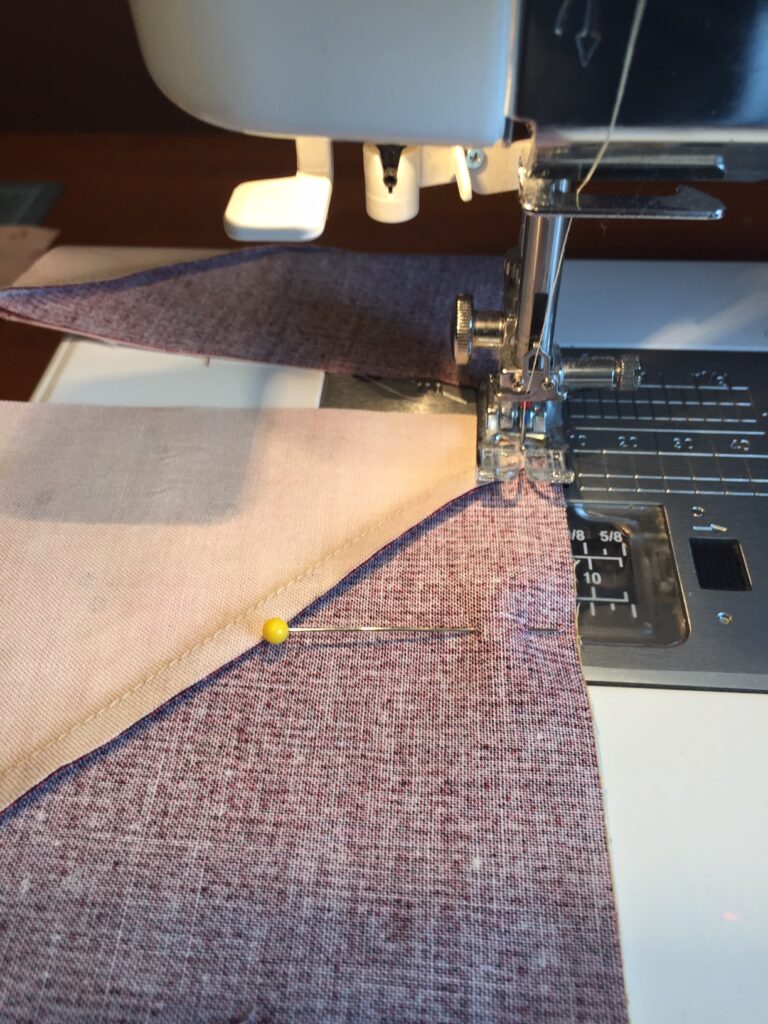
Using a ¼” seam allowance, stitch the two squares together. Don’t sew over the pins, remove them as you come up to them.
When you have the first two blocks of all three rows sewn together, line them up in their correct row placement again.

Place the last block right sides together to each of the middle squares and pin. Stitch the last block onto each row.
I like to use the chain piecing technique to sew quilt squares together. You don’t have to chain piece these squares, you can sew each of them individually if you prefer!! If you want to read about chain piecing, check out this post from the Week 1 Plus Sign Quilt Block!
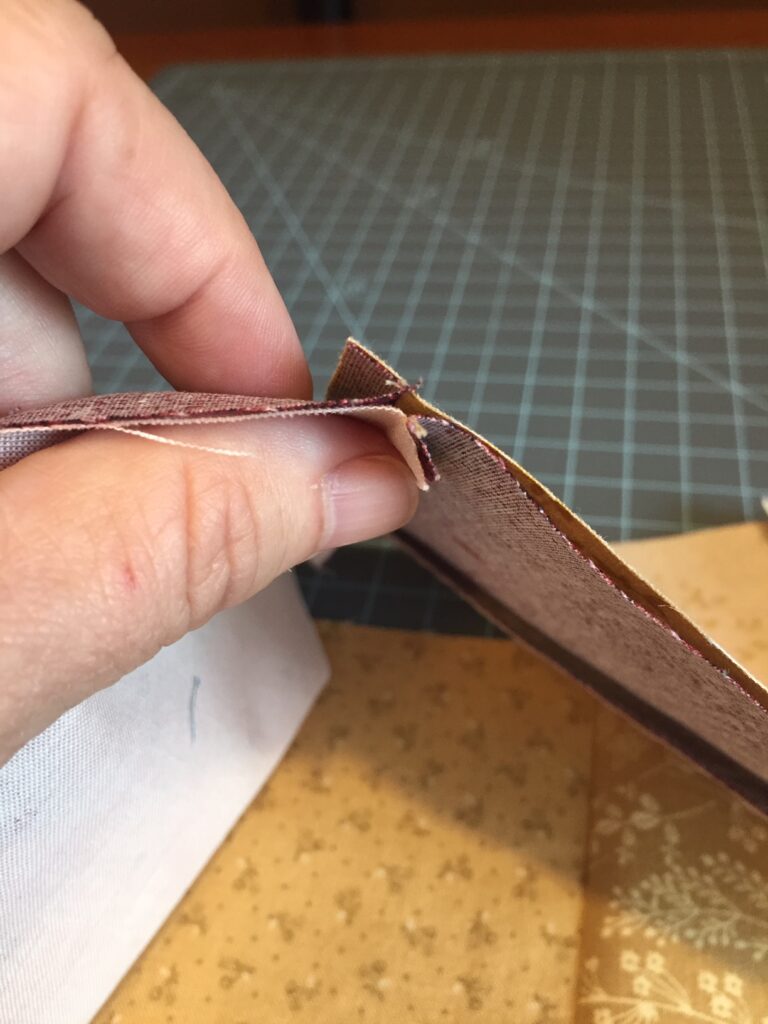
Pressing the seams…
Press the seams of row one to the right. Press the seams of row two to the left. And press the seams of row three to the right again. This way the seams will “nest” together nicely when you sew the rows to each other!
Sewing the rows together…
With rows one and two right sides together, “nest” the seams together and place a pin in these lined up seams. I also like to place a pin at the end of the rows, and a couple in the middle.
Sew the rows to each other, removing the pins as you come up to them. Be careful not to let the seam from the bottom row fold over the wrong way as you come up to it! This happens sometimes.
Press the seams of each row all in the same direction, either toward the top or toward the bottom. This way your block will lay nice and flat.
Nicely pressed seams look so pretty!!! And they help to create smooth quilting patterns later!
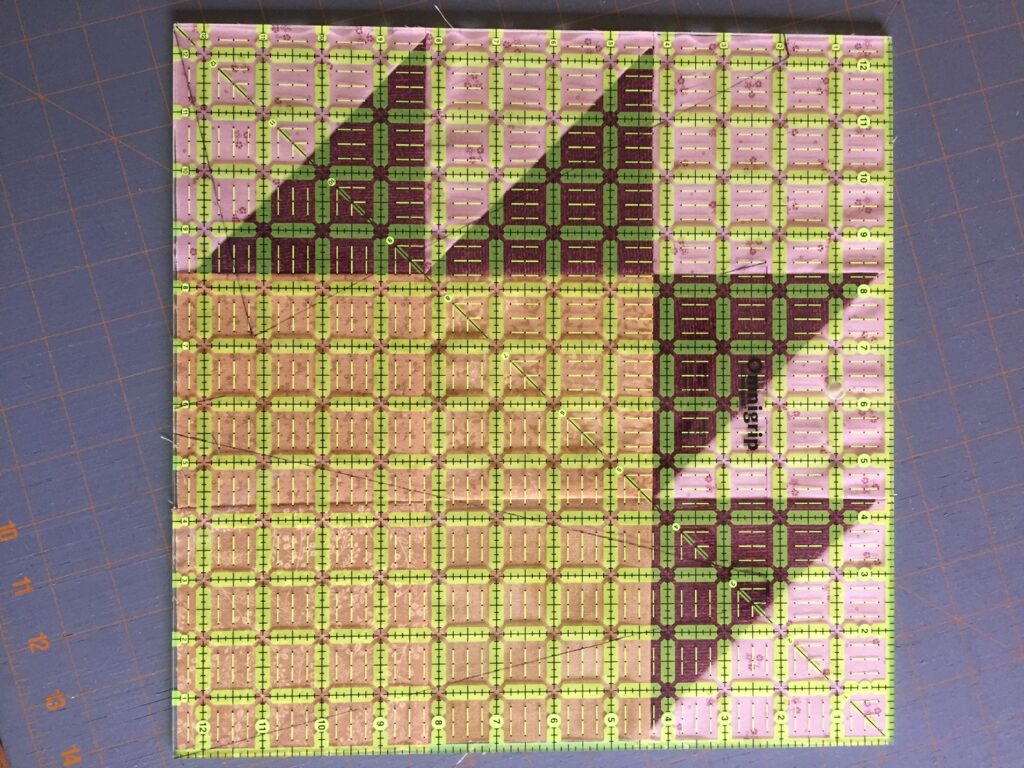
Finishing the block…
Using the measurements for the individuals squares that make up this block, the final quilt block should end up measure 12 ½” x 12 ½”. Once you’ve pressed it, lay it out on your cutting mat and square the block to make sure it’s 12 ½” square.
I have a 12 ½” square Omnigrip plastic “ruler” that works great for squaring up large quilt blocks!
I’m over the moon with the first four blocks of this Spring Block of the Week series!!! I just love the pink, gold, and burgundy combos!
You can easily catch up on all these blocks, each one only takes about an hour to sew!

Have fun making this Bear Paw Quilt Block, and have a great week!!
~Bonnie