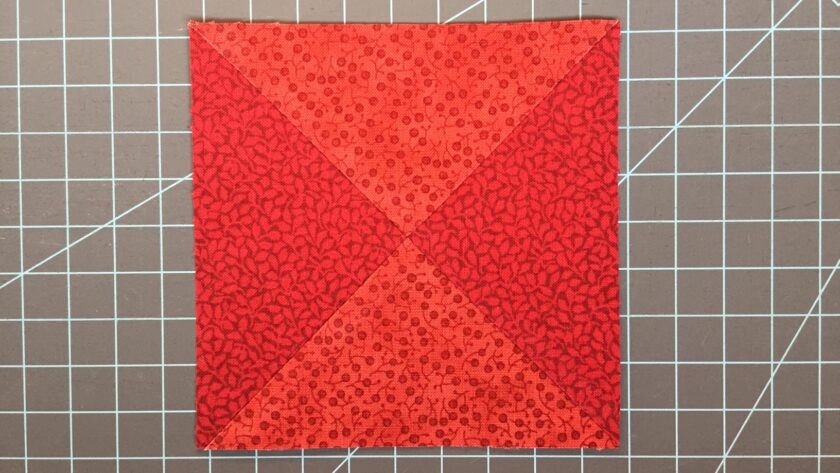
This post provides a tutorial of how you can sew easy quarter square triangle blocks for your next quilt project! Even a beginning quilter can make these easy blocks!
The quarter square triangle block has four right triangles with the 90-degree corners all meeting in the center of the block. But don’t be intimidated by the triangles! You won’t be measuring angles or cutting and sewing any triangles to make this easy quilt block. All you will work with are fabric squares!!
Wait, what? Squares can be sewn into triangles? Yup! And it’s easy peasy too!!!
Not only does this method allow you to sew a quarter square triangle block in no time flat, the technique makes two at a time!!! Let me show you how.
Post contains affiliate links and we earn commissions if you shop through the links on this page. For more information please read the disclaimer on the Privacy Policy page.

Cutting the Squares for the Quarter Square Triangle Blocks
Cut two squares out of contrasting fabric to make the quarter square triangle.

You can use a light and dark contrast, a medium and dark or a medium and light contrast, or two different colors for contrast! If you need any help deciding on colors to use you can check out a previous post on Choosing Colors and Fabrics.
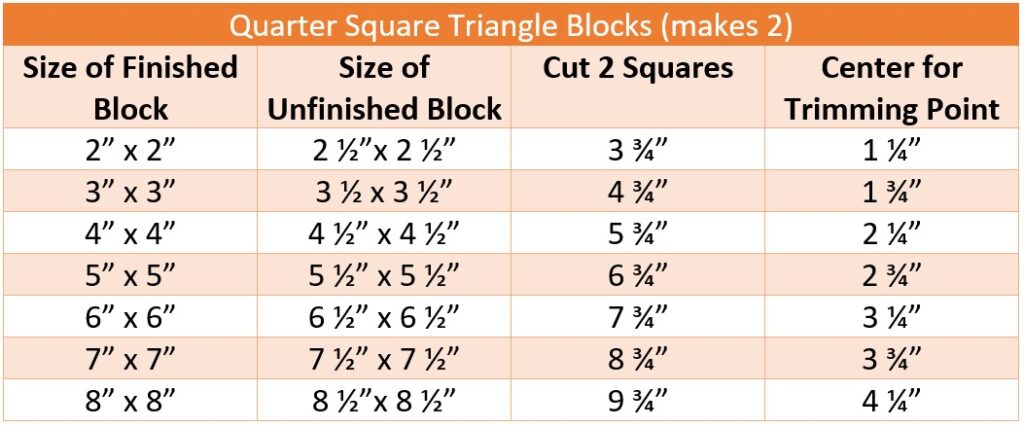
The chart below shows the sizes of squares to cut depending on the size of quilt block you need!
Step 1: Sew the Two Squares Together
Using a fine pencil and a straight edge draw a diagonal line from corner to corner on the back of one of the squares. It’s easiest to see this line if you draw it on the back of a lighter square.

Align the two squares right sides together with the drawn line facing up. Place a few pins perpendicular to the drawn line to hold the squares in place.
Sew ¼” on each side of the drawn line. Remove the pins as you come up to them.


Use either a rotary cutter or scissors to cut the squares apart along the drawn line. Press the seams toward the darker fabric. You’ve just made two half square triangle blocks!
Use either a rotary cutter or scissors to cut the squares apart along the drawn line.

Press the seams toward the darker fabric. You’ve just made two half square triangle blocks!

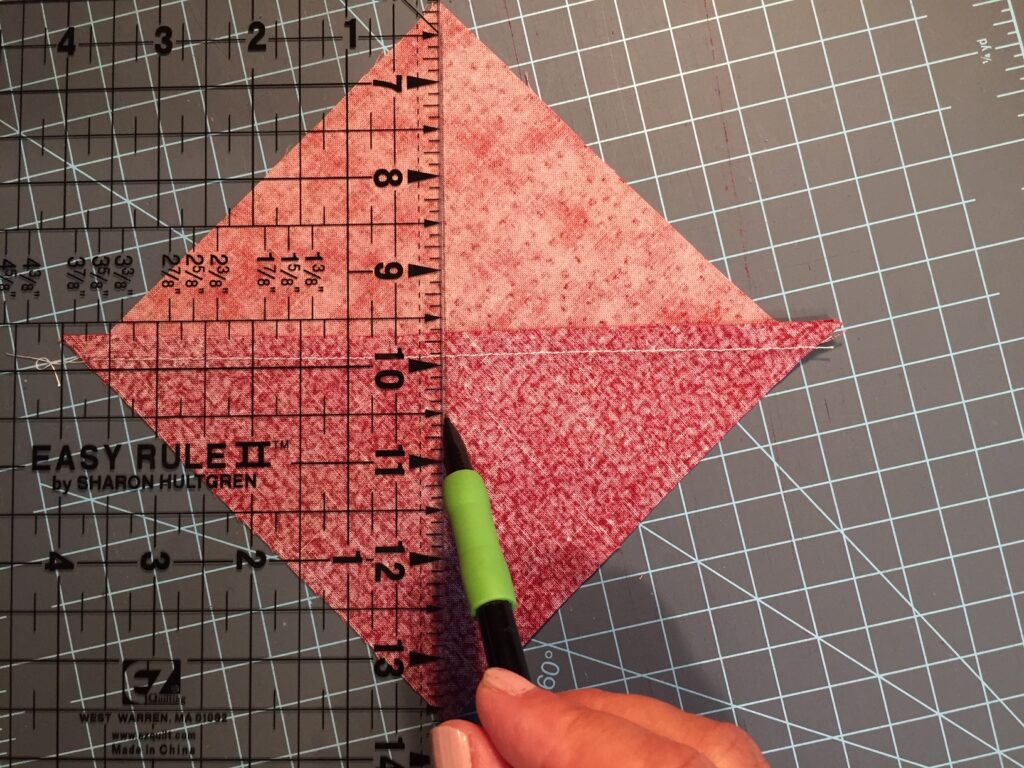
Step 2: Sew the Two Half Square Triangles Together
Using a fine pencil and a straight edge draw a diagonal line from corner to corner on the back of one of the half square triangle blocks. The line should run perpendicular to the seam.
Align the two half square triangle blocks right sides together with the drawn line facing up. The placement of the blocks needs to have the opposite fabrics facing each other and the seams aligned to each other.

Place a few pins perpendicular to the drawn line to hold the blocks in place.
Sew ¼” on each side of the drawn line. Remove the pins as you come up to them.

Use either a rotary cutter or scissors to cut the squares apart along the drawn line.
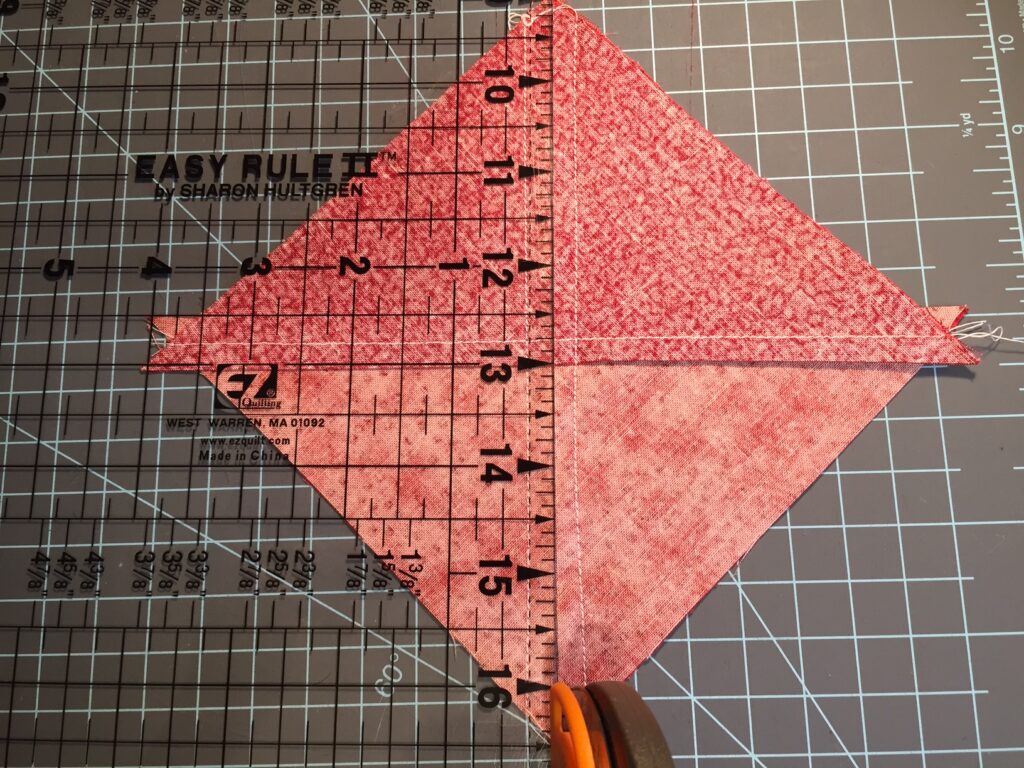
Press the seams toward either side or you can even just press them open. Nicely pressed seams even look pretty from the back!!


Voila! You’ve just made two quarter square triangle blocks!!! Now trim them to size!
How to Trim the Quarter Square Triangle Block
I use a 6 ½” square Easy Square, Jr. plastic ruler to trim most of my quarter square triangle blocks.
Determine the ½ measurement of the quarter square triangle block that you need. For example, I need a 4 ½” x 4 ½” block, so the ½ measurement will be 2 ¼”.
On the plastic ruler find where your ½ measurement lines intersect.
On the Easy Square, Jr. the 2 ¼” lines aren’t solid, so I’ve used a fine permanent marker to mark where the 2 ¼” lines would intersect. I use this measurement often so I’m ok making a permanent mark on my ruler to show this point of intersection.

Align the ½” block measurement intersection location on the ruler to the very center of the square where all of the triangles meet. Also align the 45-degree line on the ruler to run the length of the upper right corner down to the lower left corner of the block.

Make sure both of these alignments are in place and hold the ruler firm.
Trim the right and top overhanging fabric.

Flip the block around and line up the freshly trimmed sides to the size your block needs to be. For mine, it’s the 4 ½” vertical and the 4 ½” horizontal lines.

Trim the right and top overhanging fabric to finish up the neatly trimmed and accurately measured quarter square triangle block.

Repeat for the other quarter square triangle block.
Happy Quilting!
~Bonnie


