I’m so excited to share with you how to sew a Plus Sign Quilt Block! This block kicks off week one of a Spring Block of the Week project!! I hope you join me in making all 12 blocks in this Block of the Week project, starting with this Plus Sign Quilt Block!
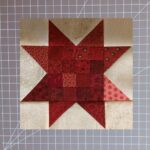
I’ve loved sewing block of the week quilts! In particular, the different Moda Blockheads projects (there have been 3) have been so very fun for me. There are several quilt designers who have the Moda Blockheads quilt along blocks posted on their blog, including Lisa Bongean (one of my favorite designers!).
I thought I’d create an easy Spring Block of the Week from lakegirlquilts that you could have fun with too!!
Post contains affiliate links and we earn commissions if you shop through the links on this page. For more information please read the disclaimer on the Privacy Policy page.
Lakegirlquilts Spring Block of the Week Project
Spring has sprung in northern Wisconsin! We’re definitely getting to enjoy an early spring this year!! The lake is starting to open up already, and the loons have returned!! After the last few years of record winters, we deserve it!! The excitement of spring has inspired me to start the Spring Block of the Week project with you all!
Over the next 12 weeks I’ll share the directions of how to make a different quilt block.
These blocks will be skill builders, and are intended for beginning level quilters. But I’m really hoping quilters of any skill level will enjoy making them with me. Even if you’re an avid quilter, you never know what you might learn!
At the end of spring, we’ll have 12 blocks that can be put together into a quilt!! Yay! Let’s get started…
Planning the Colors for Your Quilt Blocks
I don’t want you to stress too much about planning out the colors for your quilt blocks! In a previous post, I talk about choosing colors for a quilt.
I’m making my quilt scrappy, so I’m using a variety of different fabrics. You can use just two or three different fabrics if you’d like, it’s up to you!
I love scrappy quilts!!! For my project I’m using a variety pinks and yellows for the light colors. And for my dark colors I’m choosing gold and burgundy colored fabric. I might mix a little taupe or grey here and there too…we’ll see!!
If you want to make a scrappy quilt too, pick out one or a variety of a light-colored fabric. And also pick out one or several different darker colors.
The quilt blocks in this project really show off the contrast of different colors, so I suggest a light, medium, and dark color palette of colors that you love!
Honestly…have fun with the colors! Be a little daring if you’re feeling it and add multiple shades of colors!! If not, quilts with just two tones of color are very calming to me so I love those colors of quilts too!!
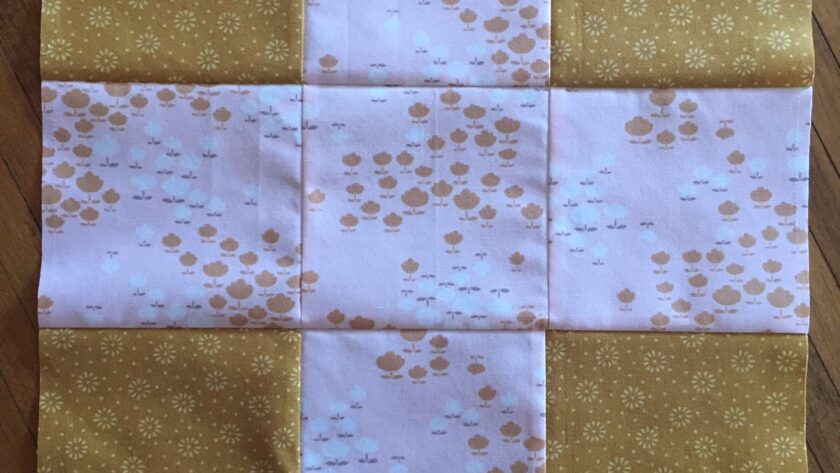
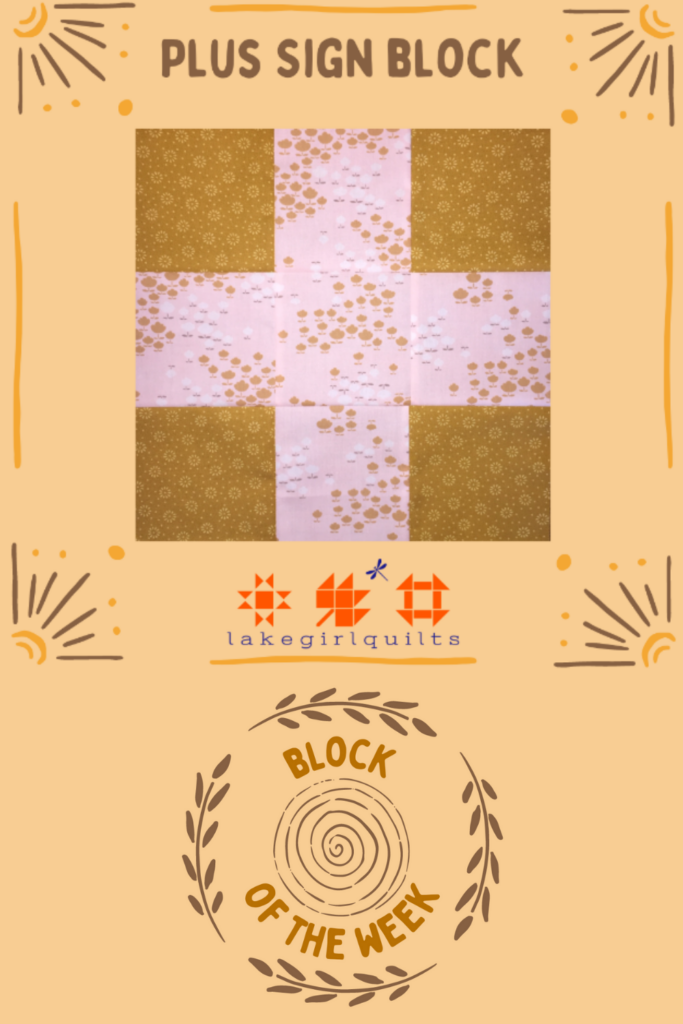
Week 1 – Plus Sign Quilt Block
I “positive”ly love this easy little quilt block. See what I did there, lol!!
The plus sign quilt block gets you warmed up by sewing together a set of simple squares. There’s not a whole lot of planning or complicated thinking that needs to take place!!
Cut the fabric for the block…
Cut four 4 ½” squares of medium or dark fabric. Also cut five 4 ½” squares of a light fabric to create the plus sign.

You can also flipflop this, and cut four light squares and cut five medium or dark squares (to create a darker plus sign).
If you’re new to quilting or cutting squares for quilts, you can take a peek at my post on using a rotary cutter or the post on basic quilt supplies!
I like the Fiskars rotary cutter because of the comfortable grip it has!!
This plus sign quilt block is also called a nine-patch block because there are nine squares that make up the block. What makes it a Plus Sign Quilt Block is the layout of the colors!!
Plan the block layout…
Lay out the squares to create the plus sign pattern. I’m lucky enough to have enough room on my sewing desk to lay out small amounts of fabric like this.

You can also set up a small table or tray next to your sewing area to lay out the squares. It’s handy to have them within reach as you sew them together!!
Sew together the squares of each row…
Begin sewing the squares together row by row. Use a 1/4″ seam allowance throughout.
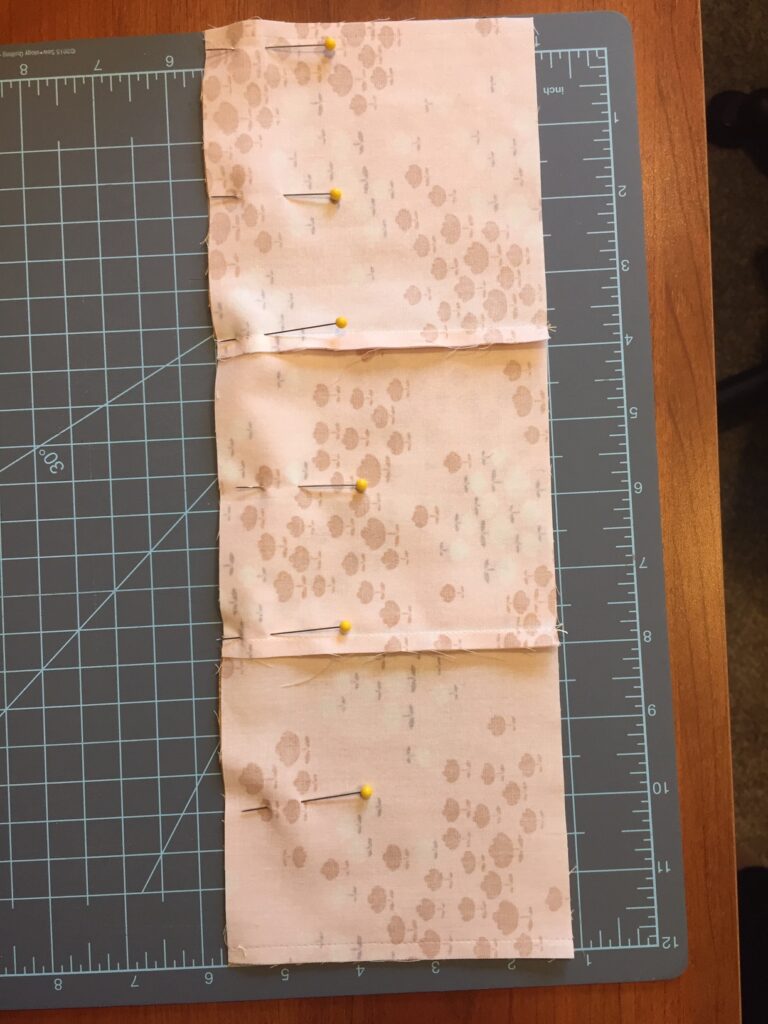
Starting with row one, place the first two squares right sides together. Place a pin in the middle and on the end.
Using a ¼” seam allowance, stitch the two squares together. Don’t sew over the pins, remove them as you come up to them.

Rather than cutting the thread when you get to the end, you can continue to sew the first two squares in row two together. This is called chain piecing, and it saves a little time and thread.
Place the first two squares of row to right sides together, pin, and stitch. Don’t snip the thread, and repeat to add the first two squares of row three on the “chain”.

When you have the first two blocks of all three rows sewn together, then snip them apart from each other.

Line them up in their correct row placement again. Place the last block right sides together to each of the middle squares and pin. Stitch the last block onto row one. Again, rather than snip when you get to the end, you can chain stitch the last square of each row onto the middle square of that row.
Snip them apart when you have all the rows sewn.
Pressing the seams…
You’ll want to press the seams, rather than iron them back and forth. Ironing the seams back and forth will stretch the fabric all wonky!


Press the seams of row one to the right. Press the seams of row two to the left. And press the seams of row three to the right again.

This way the seams will “nest” together nicely when you sew the rows to each other!

Sewing the rows together…
With rows one and two right sides together, “nest” the seams together and place a pin in these lined up seams. I also like to place a pin at the end of the rows, and a couple in the middle.
Sew the rows to each other, removing the pins as you come up to them. Be careful not to let the seam from the bottom row fold over the wrong way as you come up to it!

Press the seams of each row all in the same direction, either toward the top or toward the bottom. This way your block will lay nice and flat.
Nicely pressed seams look so pretty!!! And they help to create smooth quilting patterns later!

Finishing the block…
Using the measurements for the individuals squares that make up this block, the final quilt block should end up measure 12 ½” x 12 ½”. Once you’ve pressed it, lay it out on your cutting mat and square the block to make sure it’s 12 ½” square.
I have a 12 ½” square Omnigrip plastic ruler that works great for squaring up large quilt blocks!

Trim fabric that is outside of the 12 ½” measurement. You might not have any overhang at all, but if you do it should be trimmed so your final quilt will be square with pretty matching corners!


Storing your Quilt Blocks
I’ve purchased some cute scrapbooking paper boxes to store my quilt projects in! You can find these at most any craft supply store. These work great for this project, as the boxes are 12 ½ x 12 ½!! The same size as the finished quilt blocks in this Spring Block of the Week project!

And there’s a cute little spot for a label (just use an index card to make your label)! This way your blocks aren’t being handled and moved around. They’re all safe and dandy, ready to put together when you are!
Have fun making your Plus Sign Quilt Block and…have a great week!!!
~Bonnie