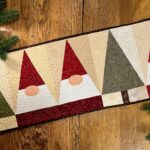
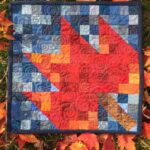
This scrappy mini quilt pattern is an easy pattern for a beginning quilter. Measuring just 12” x 13”, the Cottontail Cutie quilt is the perfect size to decorate a shelf or table. Or add a sleeve to the back of the quilt, and hang this cutie up!!
There’s nothing too complicated about the pattern. This quilt can easily be made in a day or over the weekend!! Using such small squares, you can either purchase small amounts of fabric or just use scraps to create this little cottontail bunny!
The directions for this pattern are included below. If you’d like to purchase a pdf of the Cottontail Cutie pattern, click on this link to take you to the lakegirlquilts Etsy shop!!
Inspiration for the Cottontail Cutie
I’ve always loved wild cottontail bunnies! I don’t think there’s a much cuter wild animal (other than cute little foxes of course!!)!!!


During the long Wisconsin winters we take pity on the bunnies, and buy 5 pound bags of carrots each week to feed them.
We’ve already gotten bunnies to come from across the lawn when we tap a carrot on the patio door.
My husband has gotten these little bunnies to eat the carrot from his hand. One year, we had a bunny who would put his little front paws inside the door as he ate the carrot my husband was feeding him. Cuteness overload!!!
Cottontail Cutie was designed with the upcoming Easter holiday in mind.
But also was influenced by our soft spot for cute little cottontails!!!
General Sewing Directions
The directions for this Cottontail Cutie quilt are for rotary cutting, machine piecing, machine quilting, and the binding is hand-stitched to the quilt back.
Accurate cutting and sewing enhances your final product. Pin your pieces together before sewing them to ensure proper seam alignment.
Use a ¼” seam allowance. I recommend using a special presser foot with a ¼” guide if you have one for your machine. This will help you get uniform seams, and matching corners!
Follow the directions described below as you press open the seams. Each individual row is pressed in the opposite direction of the previous row to eliminate bulk and help seams to lay flat. Rows sewn together are then all pressed in one direction for a uniform look.
The pattern calls for machine quilting, but this quilt is so small you could easily hand quilt it!
The finished quilt measures 12” x 13”.
This scrappy, mini Cottontail Cutie quilt is so cute it’ll steal your heart! It takes very little fabric to make this quilt. Carefully read through all the information below on how to create this little scrappy cutie!
Fabric Requirements
The cottontail is created using a variety of light brown prints. For the background I used a variety of buttery cream-colored fabric to show off the bunny.
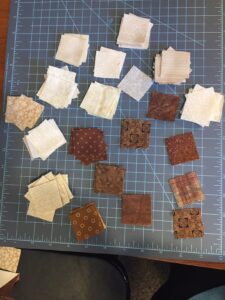
You could also use a pastel color palette for the bunny and a gray for the background. Or vice versa! Have fun deciding, and remember…there’s no rules!!
The only suggestion I’d make… if you are making a light-colored bunny (like light pink) use a darker background like a darker gray.
Don’t use light cream, as a light background doesn’t contrast enough with the pink bunny. Here’s an example of that…the bunny blends in and you can’t see it very well.

Light Brown Bunny Fabric
The total fabric needed is less than ¼ yard. However, to achieve the scrappy look of this quilt I suggest using at least 10 different prints. Either raid your stash, or purchase a few new fat quarters. You’ll need at least 1 ½” wide strip of any one fabric.
Cream Fabric for Background
Again, the total fabric needed is less than ¼ yard. However, to achieve the scrappy look of this quilt I suggest using at least 10 different prints. Either raid your stash, or purchase a few new fat quarters. You’ll need at least 1 ½” wide strip of any one fabric.
Backing Fabric
1 fat quarter
Binding Fabric
1/6 yard total
Batting
You’ll need a piece of 16″ x 17″ thin cotton batting (like Warm & Natural) to make this quilt
Cutting Directions
Using a cutting mat, plastic rulers, and a rotary cutter cut out the following squares…
Bunny
Cut 79 – 1 ½” colored squares. I suggest using at least 8-10 different prints. Either raid your stash, or purchase a few new fat quarters. You will use some of these squares to make half square triangle blocks and unique blocks.
Background
Cut 101 – 1 ½” cream squares. Again, use a variety of at least 8-10 different prints from your stash or fun new fat quarters. You will use some of these squares to make half square triangle blocks and unique blocks.
Cottontail
Cut 1 white 1 ½” square!
Binding
Cut either 2 – 2 ½” x 44” strips, or cut 4 – 2 ½” x 22” strips, trim the ends of each strip at opposing 45-degree angles as shown here
Backing
Cut a 16” x 17” rectangle
Batting
Cut a 16″ x 17″ rectangle
Making the Half Square Triangle Blocks
For parts of the bunny you’ll need 13 half square triangle blocks. Follow this process to create each of the 13 half square triangle blocks needed.

Choose 13 of the cream squares. Using a fine pencil, lightly draw a diagonal line on the wrong side of each of them.
Now, place the right side of a colored block and the right side of a cream block (the one you just drew the line on!) together.
With the diagonal line facing you (wrong side up!), sew along the line. Trim ¼” from seam.
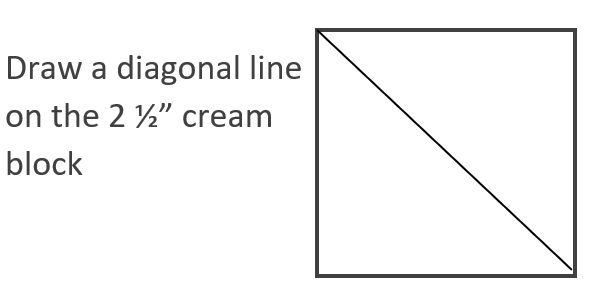


Press open toward the colored side.
This half square triangle block should again measure to be a 1 ½” square. Trim if needed to square up the block.
Making the Unique Blocks
There are 6 unique blocks that you’ll make. You’ll make 1 of each of 5 unique blocks, and make 2 of 1 of the unique blocks. Follow these steps to create each of the unique blocks.
Unique Block #1
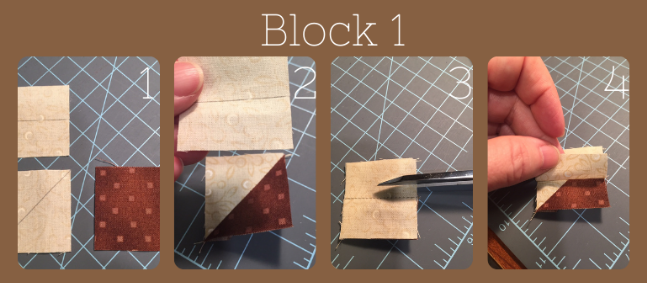
To make this block sew a half square triangle with a colored square and a cream square.
Then, on the wrong side of another cream square draw a line horizontally across the middle.
Place this square over the half square triangle (right sides together), with the half square facing in the direction so that the lower right corner is the colored corner of the square.
Sew on the drawn line to connect them. Open the block to the side that allows it to replicate the image shown here. Press open.
Trim the seam to ¼”. The block should again measure to be a 1 ½” square. Trim if needed to square up the block. This block will go on the folded ear of the bunny as shown on the diagram.
Unique Block #2

To make this block sew a half square triangle with a colored square and a cream square.
Then, on the wrong side of another cream square draw a line horizontally across the middle.
Place this square over the half square triangle (right sides together), with the half square facing in the direction so that the lower left corner is the colored corner of the square.
Sew on the drawn line to connect them. Open the block to the side that allows it to replicate the image shown here. Press open.
Trim the seam to ¼”. The block should again measure to be a 1 ½” square. Trim if needed to square up the block. This block will also go on the folded ear of the bunny as shown on the diagram.
Unique Block #3

You’ll make 2 of these blocks!
To make this block sew a half square triangle with a colored square and a cream square.
Then, on the wrong side of another colored square draw a line diagonally from corner to corner.
Place this square over the half square triangle (right sides together) so that the drawn line goes up from the bottom left to the upper right, with the half square triangle facing in the direction so that the lower left corner is the colored corner of the square.
Sew on the drawn line to connect them. Open the block to the side that allows it to replicate the image shown here. Press open.
Trim the seam to ¼”. The block should again measure to be a 1 ½” square. Trim if needed to square up the block. This block will go in between the two ears, as shown on the diagram.
Unique Block #4

To make this block sew a half square triangle with a colored square and a cream square.
Then, on the wrong side of another colored square draw a line vertically down the middle.
Place this square over the half square triangle (right sides together), with the half square facing in the direction so that the upper left corner is the colored corner of the square.
Sew on the drawn line to connect them. Open the block to the side that allows it to replicate the image shown here. Press open.
Trim the seam to ¼”. The block should again measure to be a 1 ½” square. Trim if needed to square up the block. This block will go on the back of the bunny head as shown on the diagram.
Unique Block #5

To make this block sew a half square triangle with a colored square and a cream square.
Then, on the wrong side of another colored square draw a line vertically down the middle.
Place this square over the half square triangle (right sides together), with the half square facing in the direction so that the lower left corner is the colored corner of the square.
Sew on the drawn line to connect them. Open the block to the side that allows it to replicate the image shown here. Press open.
Trim the seam to ¼”. The block should again measure to be a 1 ½” square. Trim if needed to square up the block. This block will go on the back of the bunny head as shown on the diagram.
Assemble the Quilt Top
Now that you have all your 1 ½” squares cut out and your half square and unique blocks ready, you want to plan how they’ll be arranged to make up the quilt top.
I like to lay all my squares on a card table next to my sewing machine and play with arranging them until I get the look I want.
Follow the diagram to obtain the shape of the cottontail bunny. The layout will be 13 squares across and 12 squares down.

The quilt top has 12 rows.
Begin stitching squares together (right sides facing) to complete each row. Remember to use a ¼” seam allowance for all seams.
I really like to use my ¼” seam foot to make sure all my seams are exactly ¼”!! This is especially important when sewing such tiny squares together.
If you don’t have this type of foot, make sure you know exactly where your ¼” sewing line is on your machine, and be careful to follow it!
As you complete a row, lay it back down on the table in the right placement to make sure you don’t mess up your arrangement of blocks.
Pressing the Blocks and Rows

- I wait to press the rows until I have each of them sewn together. Be careful to just “press” and NOT “iron” the seams in a back-and-forth motion, or your quilt will stretch out of shape.
- Begin by pressing the seams of the first row all in one direction. Press the seams of the second row in the opposite direction. Continue to rotate the pressing direction of each row until you have the seams of all rows pressed. Think…odd rows 1, 3, 5, etc. press the seams to the right. Even rows 2, 4, 6, etc. press the seams to the left.
- By using this rotating direction of pressed seams, you will have less bulk when you sew the rows to each other. This method of pressing distributes the bulk, which will make you happy when you machine quilt your project! Bulky seams can lead to bumpy quilting patterns, broken thread, and overall unevenness of your machine-quilted quilt top.
- Now that you have the pieced rows pressed, sew them together! Pin rows 1 and 2 together, right sides together. Make sure to line up the seams, and pin to hold them in place. Remove the pins as you come to them when you’re stitching the ¼” seam. I like to press each set of rows as I sew them together. The rows all get pressed in one direction, either towards the top or towards the bottom. By pressing them all in one direction it will make for a more uniform and smooth quilt top. Repeat until you have all of the rows sewn to each other and pressed.
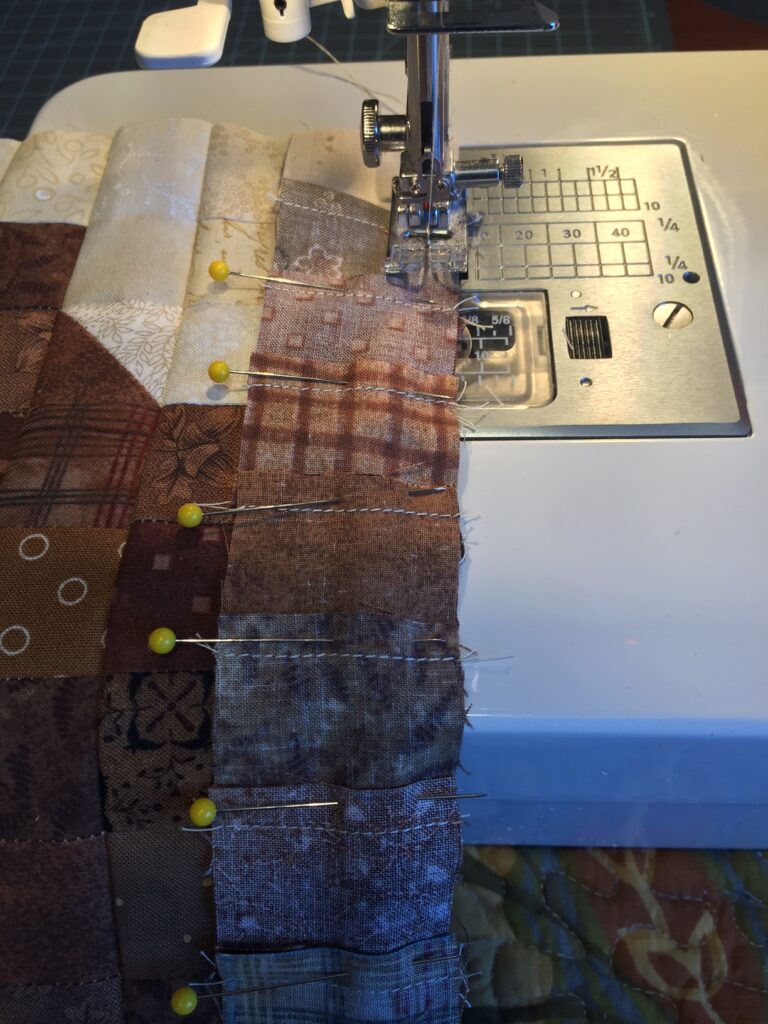
Nicely pressed quilt blocks and tops are a work of art, and a skill to develop! I love how pretty they look from the back too!!
Finishing the Quilt
Now that you have your quilt top sewn together, it’s time to finish it!
Layering the Top, Batting, and Back
I refer to layering the quilt as “sandwiching”. You need to sandwich the top and back with the batting in the middle.
For a larger quilt, this process takes a bit more time and steps. For this mini quilt, it’s a breeze to sandwich the layers together!
Step 1
On a table or countertop, use masking or painter’s tape to tape down the backing fabric.
As you tape the back to the table, you’ll want to make sure the fabric is smooth, without wrinkles.
Make sure the right side of the fabric is facing down!
Step 2
Lay the batting on top of the taped-down quilt back, and move your hands across it to smooth it all over.
This will get rid of any wrinkles in the batting, and help to adhere it to the backing fabric.
This quilt is so small you don’t need to use basting spray to adhere the layers together. Just a few pins will do the trick!
Step 3
Once you have the batting placed on top of the quilt back, center the top of the quilt (the flimsy!) over the two bottom layers.
Right side facing up, of course! The two bottom layers of the quilt (the back and the batting) should extend about 2” all around the outside edges of the quilt top.
Move your hands across the quilt top to smooth it all over, and help remove any wrinkles. This will also help adhere the quilt top to the batting a little bit.
Once you have the top of the quilt all smoothed out, use large safety pins to baste all three layers together.
I like to use 1 ½” stainless pins, and I keep them all in a cute old canning jar that was my grandma’s.
Put a pin in each corner of the quilt sandwich, in the middle, and around the quilt so the three layers don’t move around when you’re machine quilting this project.
I used about 12-14 pins to hold the sandwich together. You really don’t want to use more than this or you’ll be needing to stop a lot when you’re quilting to remove pins, which upsets the mojo of your quilting rhythm, lol!
“Quilting” the Quilt
I used a circular cinnamon bun pattern to machine quilt my layers together.

For the bunny tail I used a flower pattern to make it stand out a bit.
Use whatever free-motion stitch you’d like, or use a straight stitch to quilt in the ditches or along the seams.
You’ll need a darning foot to free-motion quilt, and you’ll need to either be able to lower the feed dogs on the machine or place a special cover over them.
If you’re using a straight stitch to machine quilt you’ll need a walking foot.
As an alternative, you can hand-quilt these layers together too.
Binding the Quilt
When you’ve finished quilting the layers together, it’s time to bind the edges of your quilt!
I’ll do my best to describe the binding process below, but if you’re confused by my directions there are lots of videos on the Internet that will demonstrate the process for you.
Step 1
Prepare Binding Strip – Take your 2 ½” binding strips that you previously cut and prepare to sew them together. To do this, fold the strip in half. Using your ruler, find the 45-degree line and lay it along the bottom of the folded strip. Now, you can cut a 45-degree angle through both layers. When you open up the strip each end will have the angle facing in the opposite direction.
Step 2
Align two strips together perpendicularly along the 45-degree ends. Who ever thought you’d use those 4th grade geometry skills again, lol! Pin the ends and sew them together. Press the seams open.
Step 3
Then, fold the binding strip in half (wrong sides together), and press.
Step 4
You’ll need a finished strip that is about 90” in total length, you will trim it after it’s sewn to the layers.
Step 5
Sew the Binding Strip to the Quilt – Begin to sew the raw edge of the binding to the quilt by pinning it along one side. Be careful to sew the raw edge of the binding strip to the quilt, not the folded edge!
Step 6
I usually start sewing the binding strip in the middle of the quilt side that I’m starting with. Start sewing about 5” in from the end of the binding strip, leaving a hanging “tail” on the binding. You’ll sew this to the end of the binding strip when you finish sewing all along the sides of the quilt.
Step 7
Stop sewing on the first side ¼” from the corner, use a pin to mark this location and sew right up to it. Backstitch a bit, and cut your thread but DON’T cut the binding strip.
Step 8
Making the Mitered Corner – Now, remove the quilt and binding strip from your machine and fold the binding strip straight up so it’s perpendicular from the side you were just sewing on.
Step 9
Fold the binding strip back down on itself and match it to the edge of the quilt you just sewed it to, and the next edge of the quilt you’re about to sew it to. Pin this fold in place, and pin the binding strip to this edge of the quilt and continue to sew it, again stopping ¼” from the next corner and repeating the folding process described above.
Continue in this manner until you are on the last side of the quilt, the side you started on.
Step 10
Connecting the Ends of the Binding – Stop stitching about 4” from where you started. Backstitch and cut the thread (but not the binding strip, not yet!), remove the quilt and binding strip from the machine.
Step 11
You now have two “tails” of the binding strip, one from where you started stitching it to the quilt and one from where you just stopped. You’ll need to join these tails together so that you have a continuous binding strip to finish sewing down to the quilt. This can be tricky!
Here I don’t worry about cutting 45-degree angles on each end of the binding strip to sew it together to make a continuous strip.
If you can master this technique, my hat is off to you!!
What I do is measure how much more binding strip I’ll need to finish sewing it to the edge of the quilt.
I then cut a straight line along each end of the binding strip, adding ¼” to each end so I can sew the ends together with a ¼” seam (right sides together).
Continue to sew the now continuous binding strip to the quilt.
Trim the Batting and Back
Trim the batting and quilt back to ¼” from the edge of the quilt top. I use a ruler and a rotary cutter to accomplish this task. Work carefully, so you don’t cut into your quilted project.
Hand-Stitch the Folded Binding Edge to the Quilt Back
Here is my FAVORITE part of the process, hand-sew the folded edge of the binding strip to the back of the quilt.
When you get to the corner, carefully turn the corner right-side out to make a nice, mitered corner. I tack a few stitches up the corner to hold it in place, and then continue stitching along all sides and corners until…

VOILA! Your binding is complete!
If you’d like, you can add a label to the back of your Cottontail Cutie Quilt.
I hope you enjoy making this scrappy, mini quilt!!
Cheers!!!
~Bonnie


