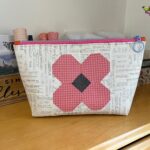
The Starry + Bright Christmas Pillow Pattern comes together quickly and is such a joy to make! Even beginning quilters will have great success sewing this festive holiday pillow.
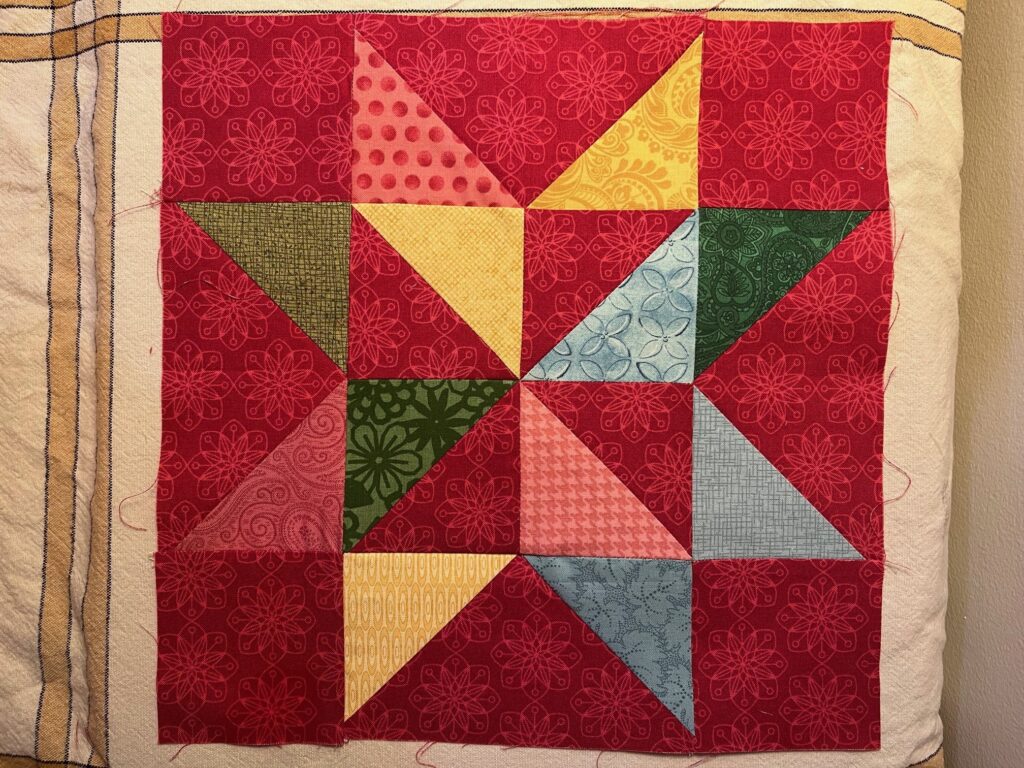
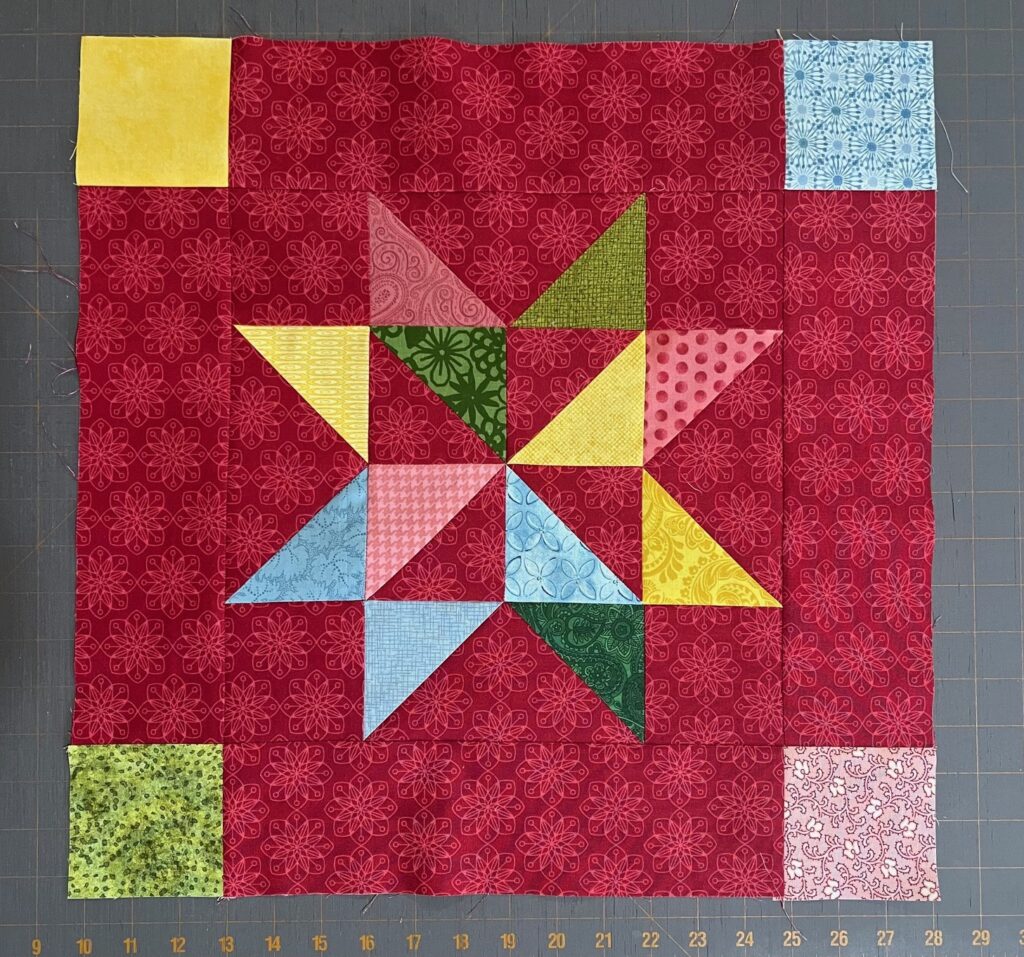
I stitched my pillow with a red background and a mix of vintage-inspired Christmas fabrics for the star points and the pinwheel center that gives this design its charming sparkle.
Try making yours in classic red and white, cheerful red and green, or even crisp blue and white! There are no rules when it comes to choosing fabrics for this cozy Christmas pillow!
Whip up one (or a few!) to keep for yourself or to give as handmade holiday gifts. You can finish this beginner-friendly quilted pillow in just an afternoon or evening.
This Starry + Bright Christmas Pillow coordinates with my Merry + Bright Christmas Pillow!
Let’s get sewing!
Post contains affiliate links and we earn commissions if you shop through the links on this page. For more information please read the disclaimer on the Privacy Policy page.

Fabric Requirements for the Starry + Bright Christmas Quilt Pillow Pattern
I just pulled fabrics from my stash for this adorable easy pillow pattern! Shop your local quilt store if your stash is running low.
Or shop online at Fat Quarter Shop or Connecting Threads to get your fabric!!
Here are the yardage totals needed
Red fabric – 1/2 yard
Green fabric – 1/8 yard
Blue fabric – 1/8 yard
Pink fabric – 1/8 yard
Yellow fabric – 1/8 yard
Batting – 22” x 22” piece
Backing for Quilted Top (this can be any scrap piece of fabric, you won’t see it!) – 5/8 yard
Pillow Back fabric – 1/2 yard
Muslin or Scrap Fabric (for pillow insert) – 5/8 yard
Polyester Fiberfill – 1 pound
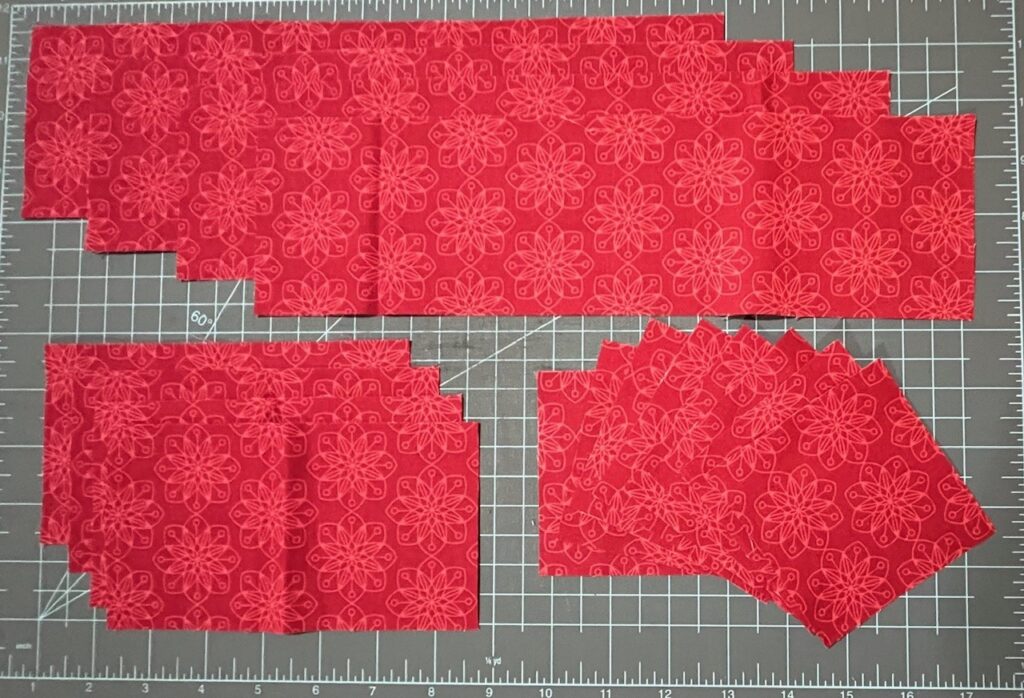
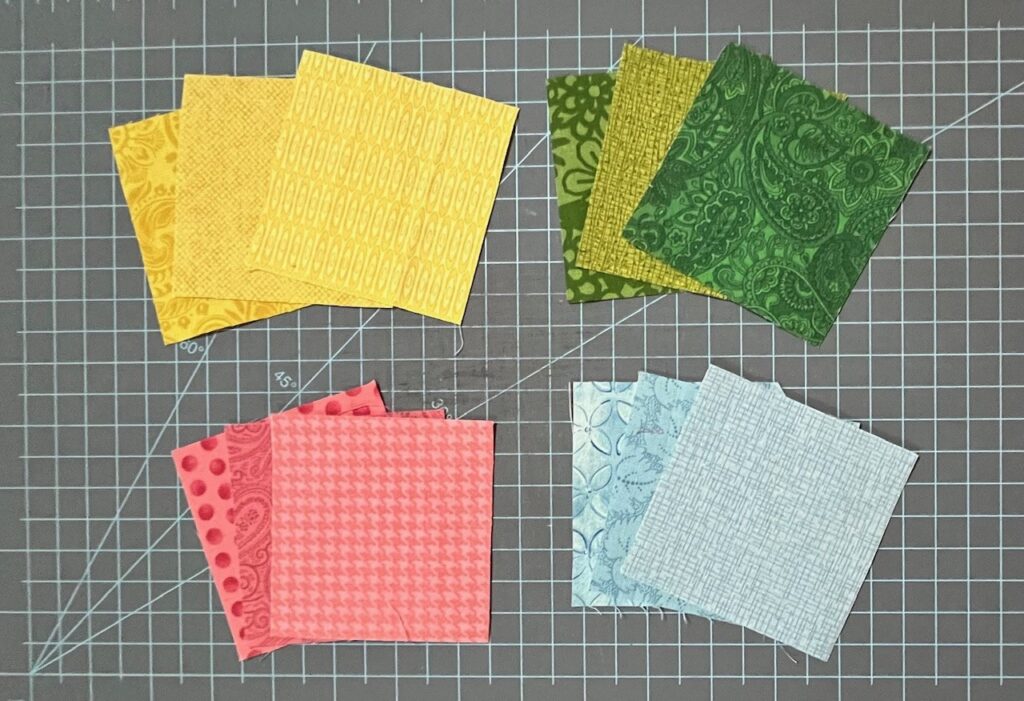
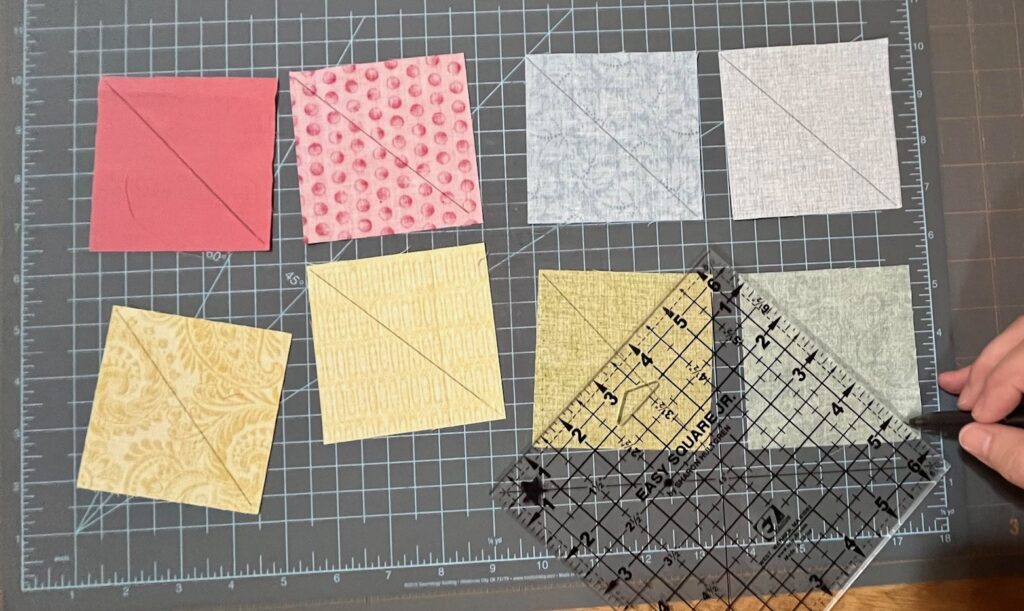
Cutting Fabric for the Starry + Bright Christmas Quilt Pillow Pattern
Red fabric – Cut (8) 3 1/2″ x 3 1/2″; (4) 3 1/2″ x 6 1/2″; and (4) 3 1/2″ x 12 1/2″ pieces.
Green fabric – Cut (4) 3 1/2″ x 3 1/2” pieces.
Blue fabric – Cut (4) 3 1/2″ x 3 1/2” pieces.
Pink fabric – Cut (4) 3 1/2″ x 3 1/2” pieces.
Yellow fabric – Cut (4) 3 1/2″ x 3 1/2” pieces.
Backing for Quilted Top – Cut (1) 22” x 22” piece.
Batting – Cut (1) 22” x 22” piece.

Pillow Back fabric – Cut (2) 12 1/2″ x 18 1/2″ pieces.
Muslin or Scrap Fabric – Cut (2) 18 1/2″ x 18 1/2″ pieces.
General Sewing Directions for the Starry + Bright Christmas Pillow Pattern
The directions for this quilt are for rotary cutting, machine piecing, machine quilting, and the binding is hand-stitched to the quilt back.
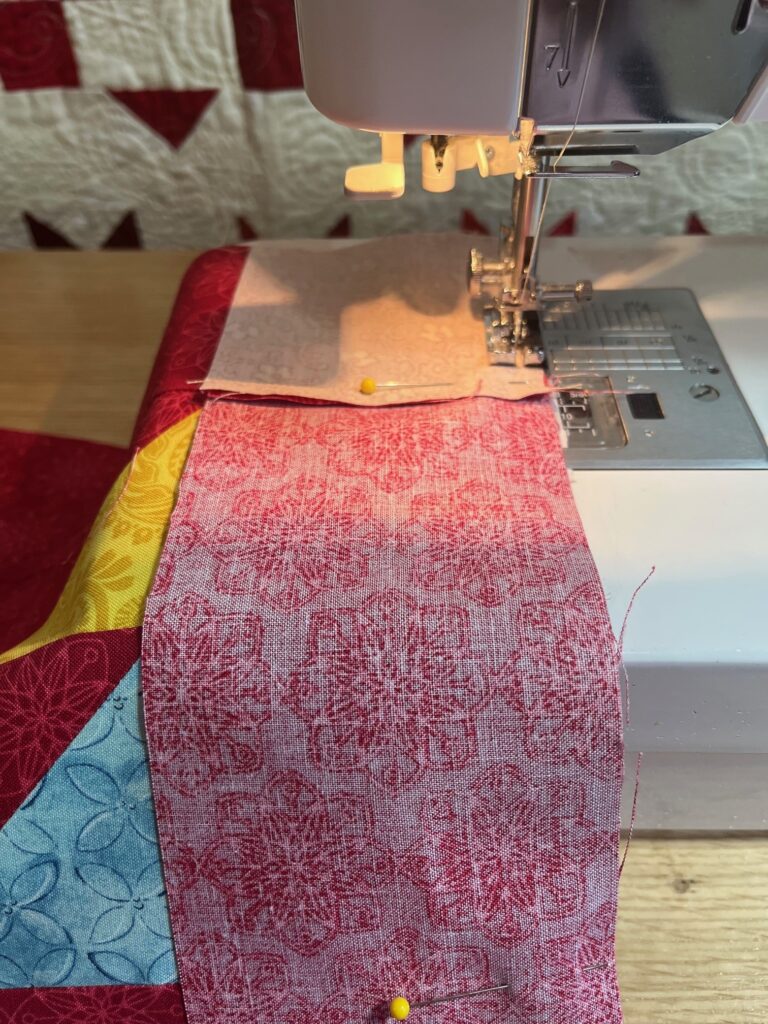
Accurate cutting and sewing enhances your final product. Pin your pieces together before sewing them to ensure proper seam alignment.
Use a carefully followed 1/4” seam allowance to help you get uniform seams and matching corners!
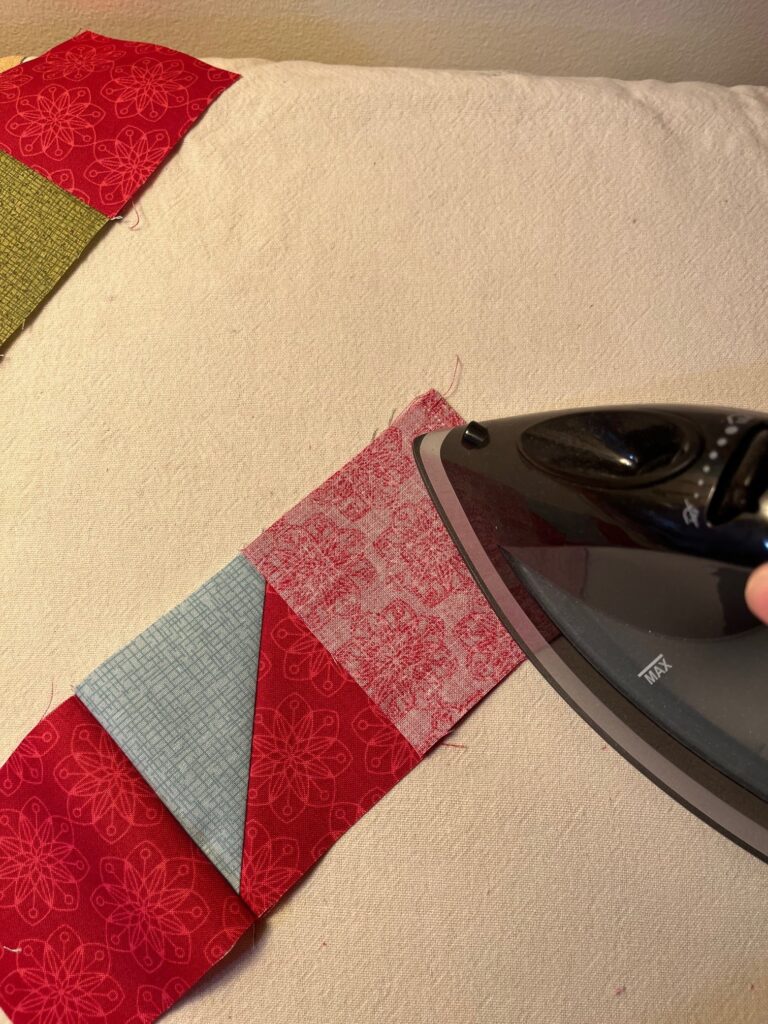
Follow the directions described below as you press the seams.
the Pinwheel Block for the Starry + Bright Christmas Quilt Pillow Pattern
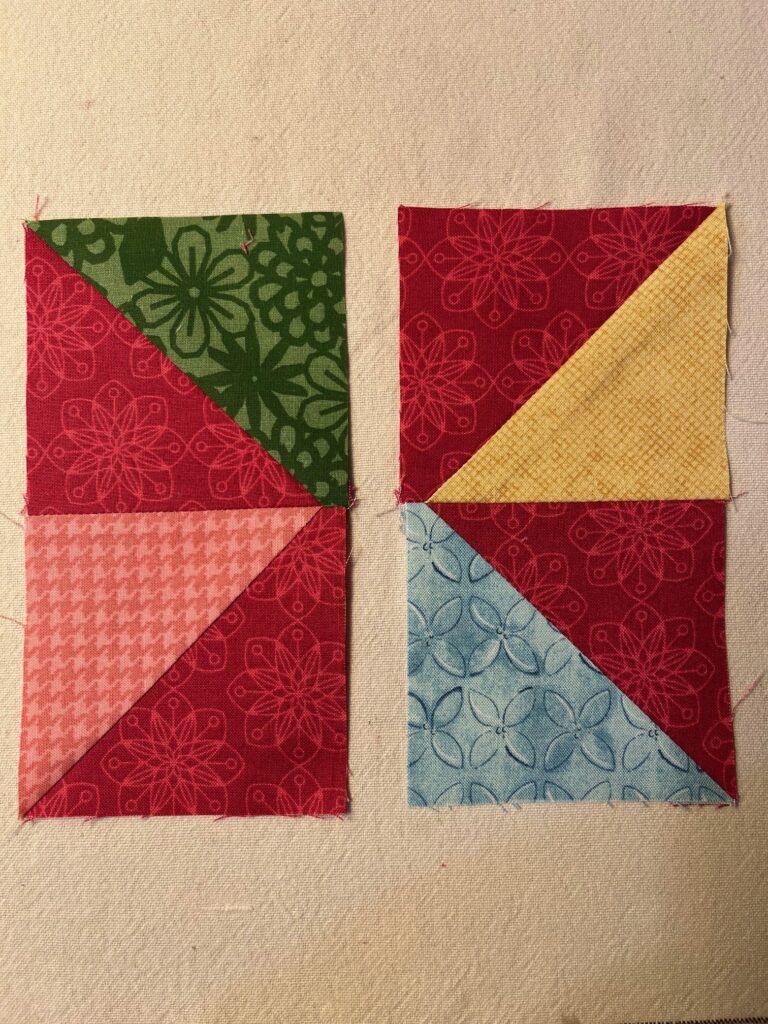
Making the 6 1/2″ Pinwheel Center
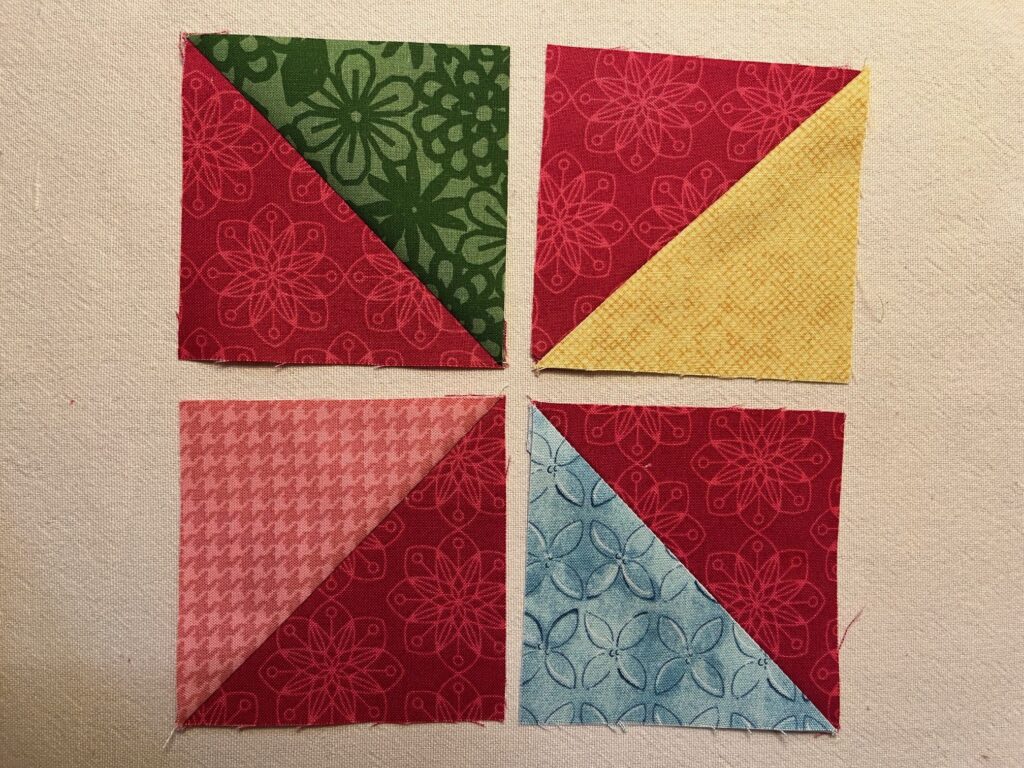
The center of your Starry + Bright Pillow is a cheerful 6 1/2″ unfinished pinwheel block made from four half-square triangles (HSTs). Each HST will measure 3 1/2″ square (unfinished). You’ll make one HST at a time, sewing right along the diagonal line.
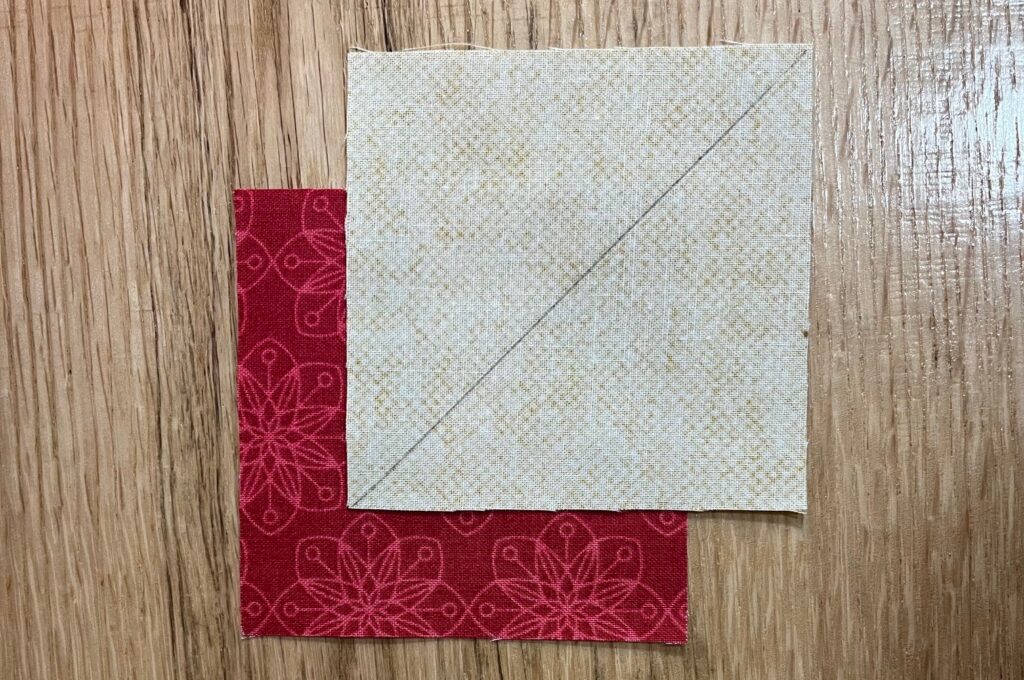
Step 1: Mark the Diagonal
On the wrong side of each colored square, draw a diagonal line from corner to corner.
Step 2: Sew the HST
Place the colored square right sides together with a red square.
Sew directly on the drawn diagonal line from corner to corner.

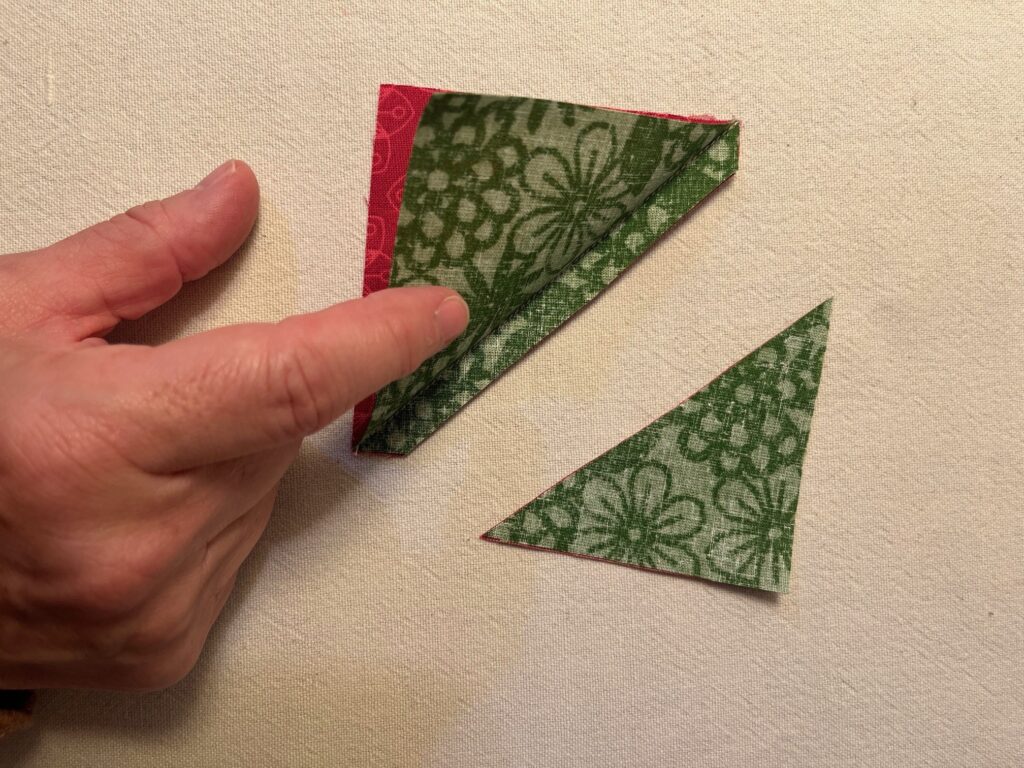
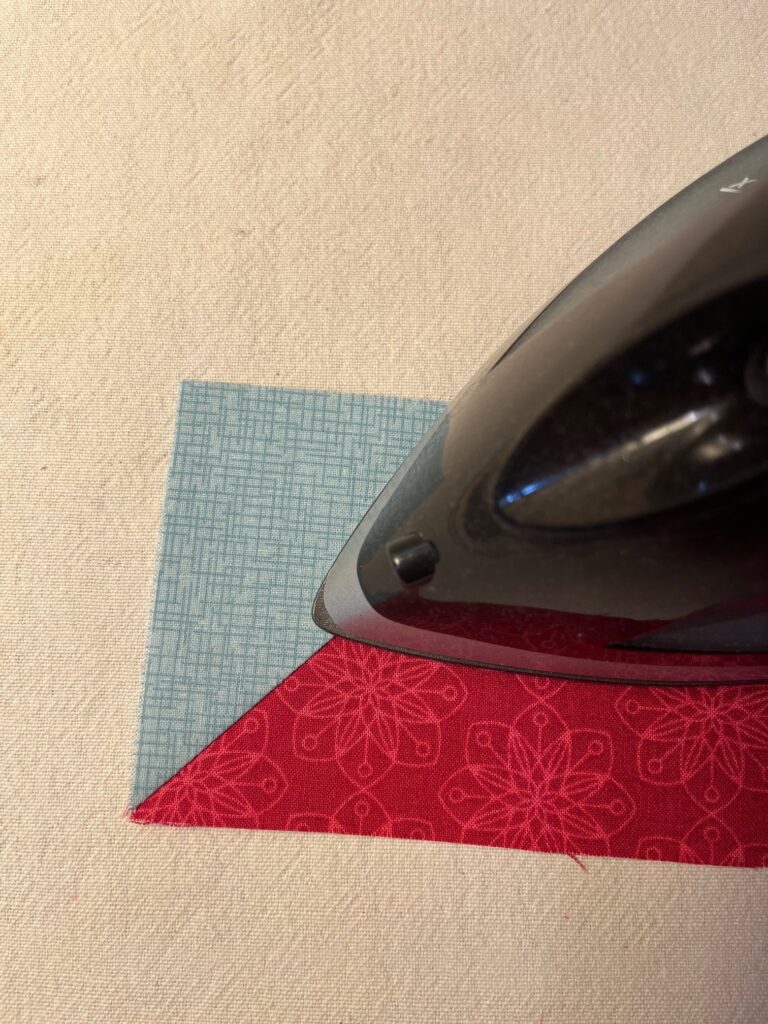
Step 3: Trim and Press
Open HST and press the seam toward the red corner.
Trim the bottom two layers (the bottom red layer and the bottom colored layer )1/4″ from the seam line to create your HST.
Each HST should now measure 3 1/2″ square (unfinished).


Step 4: Arrange and Sew the Pinwheel
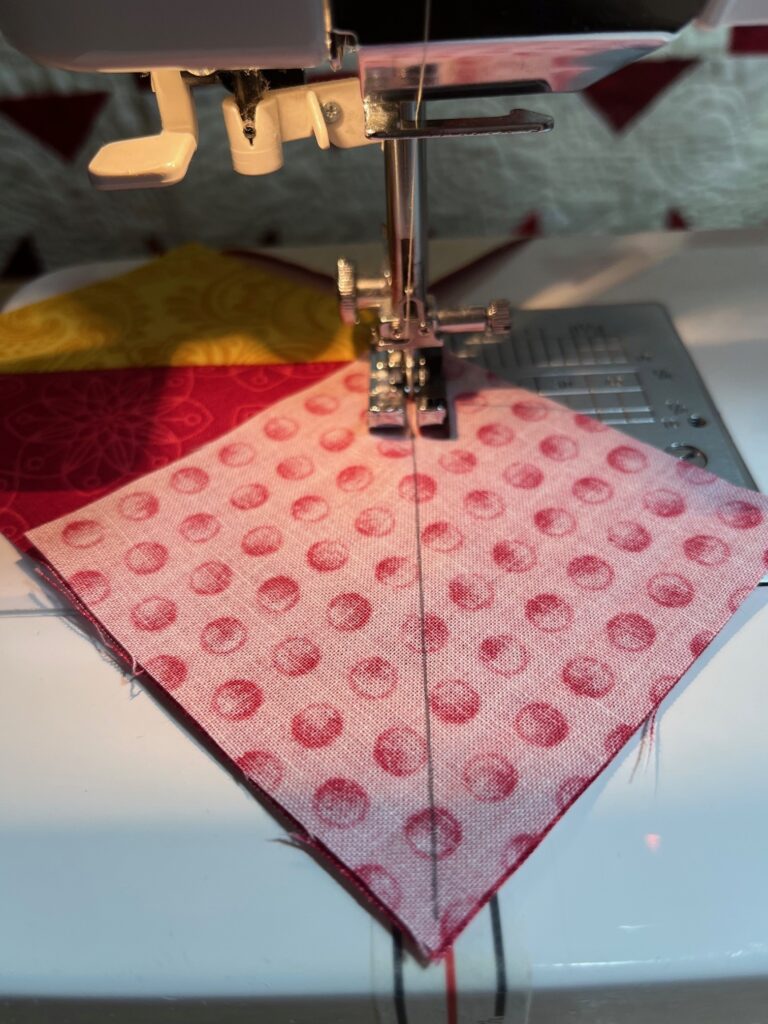
Lay out your four HSTs in a pinwheel arrangement, with the red triangles forming the center.
Sew the top two HSTs together and the bottom two together. Press seams open.
Sew the two rows together to complete the block, pressing the final seam open or to one side.

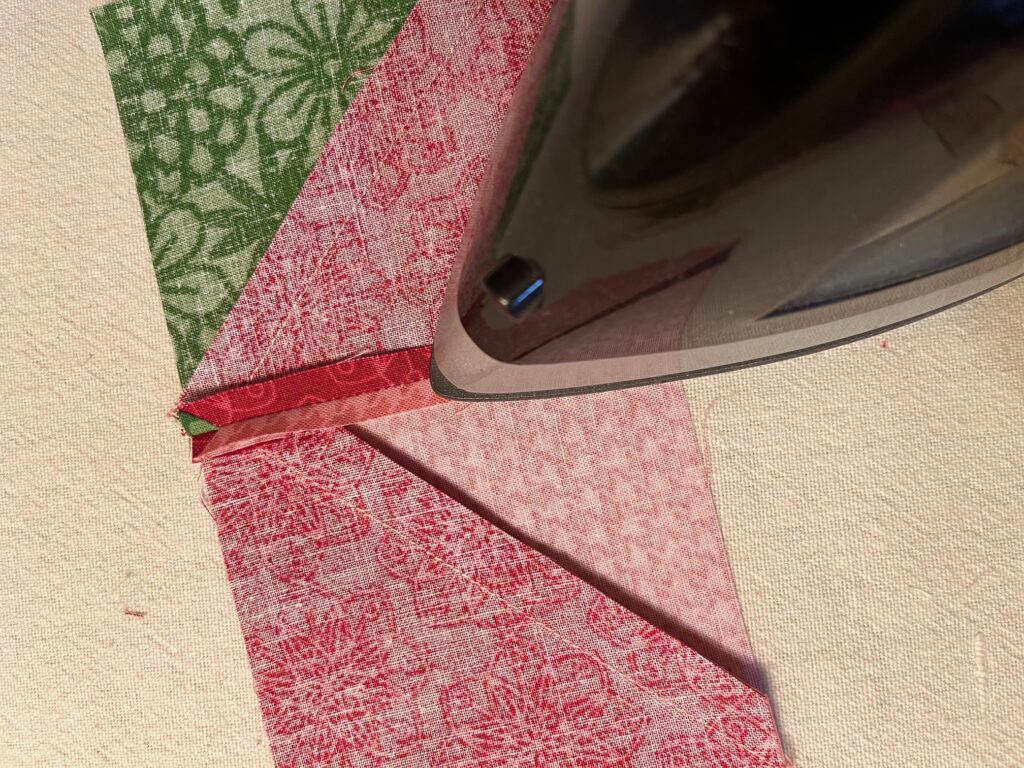
Then sew the two rows to each other. Make sure to nest and pin the middle seams to hold in place!

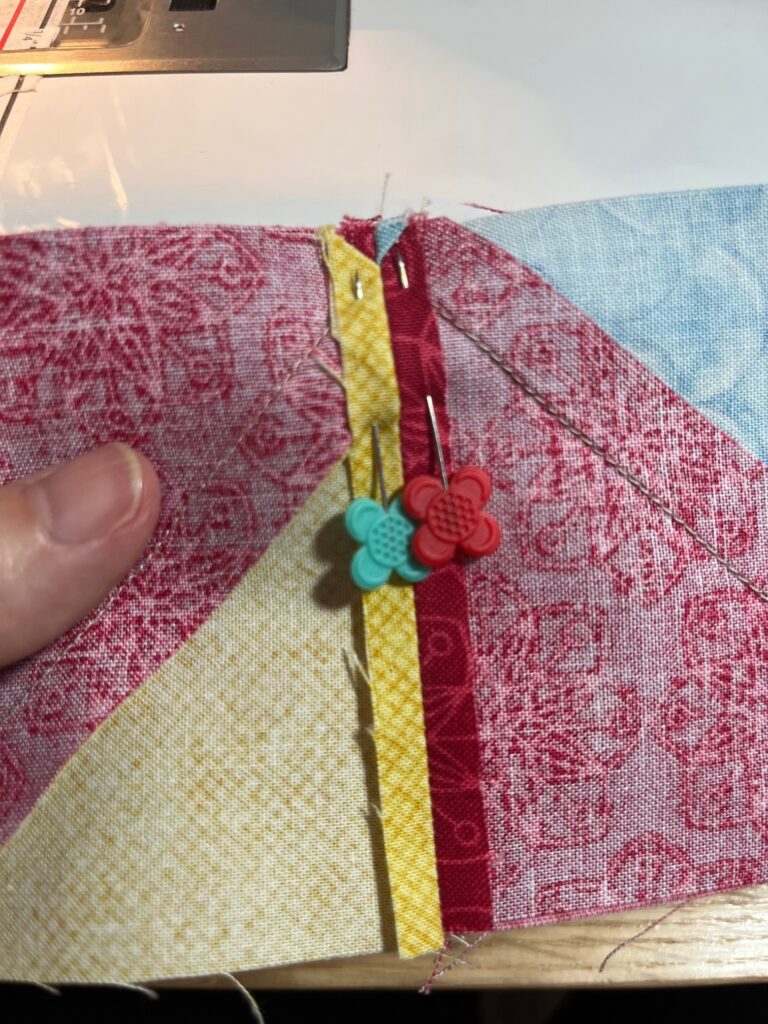

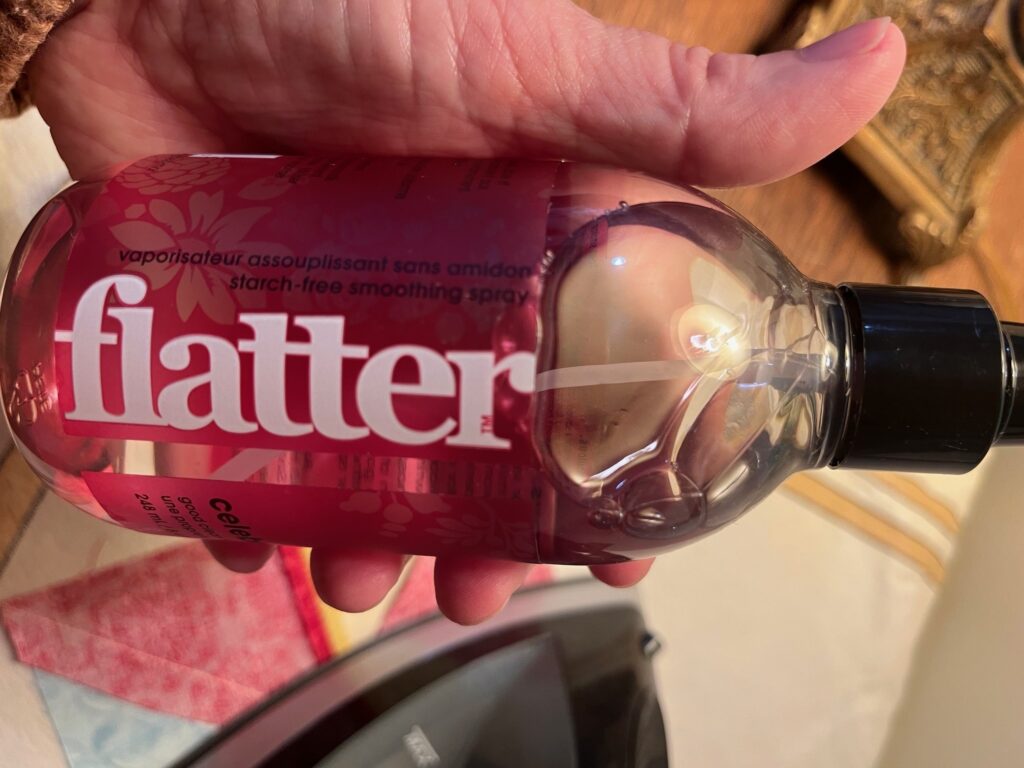
It’s helpful to use a pressing spray to help the center seams to lay flat. I like to use Flatter! You can purchase it on Amazon!!


Your finished pinwheel block will measure 6 1/2″ unfinished, ready to become the centerpiece of your pillow.
Sew the Larger Flying Geese Units for the Star of the Christmas Pillow Pattern
Draw a diagonal line on the wrong side of each of the other 3 1/2″ blue, green, pink and yellow squares.
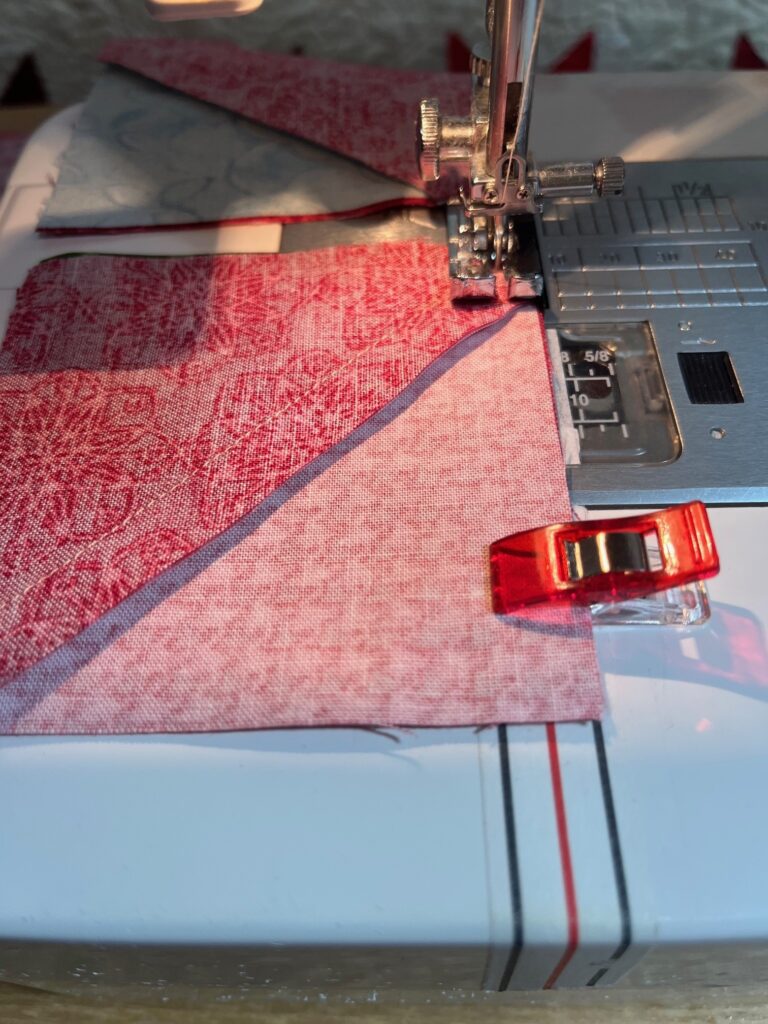
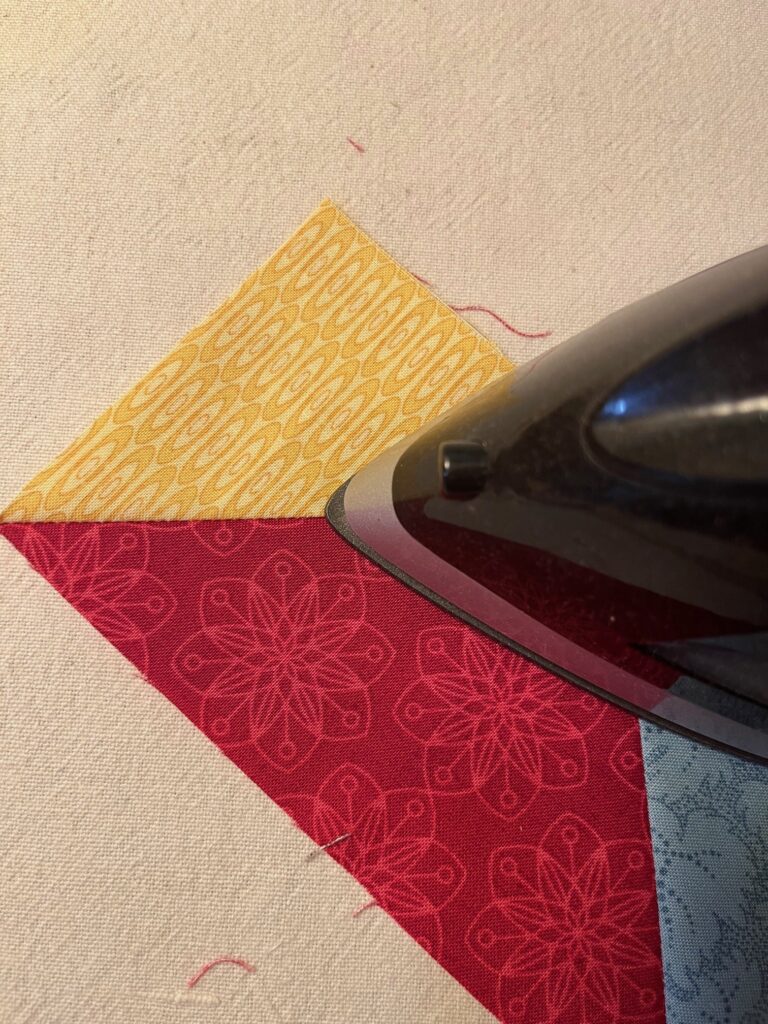
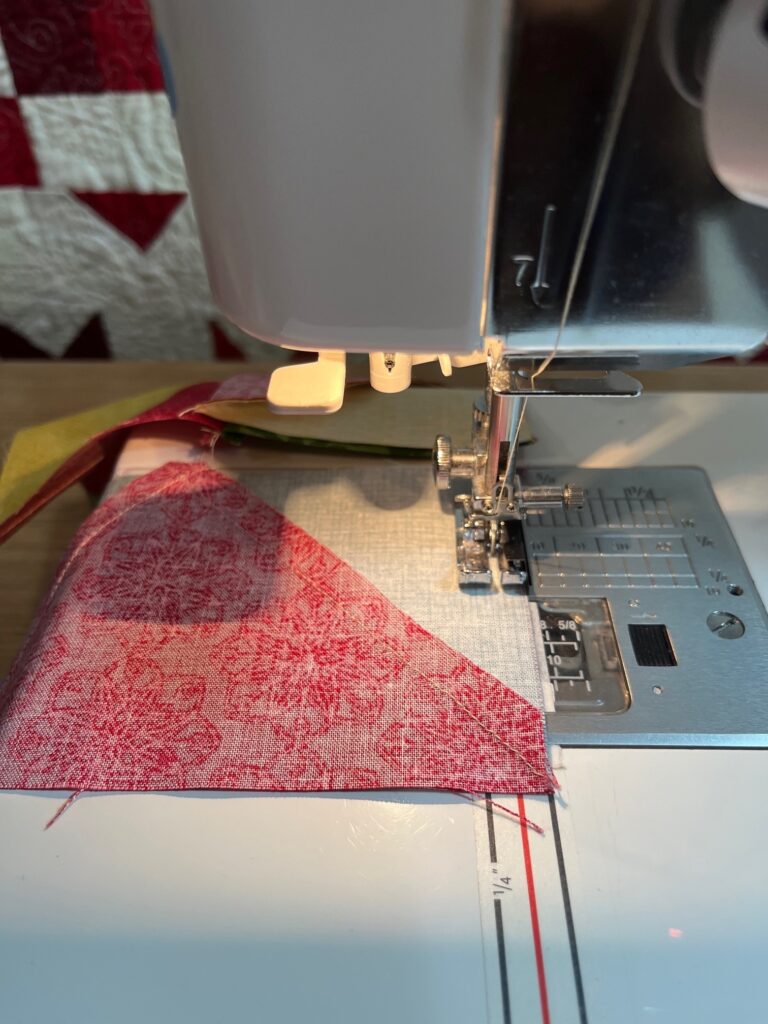
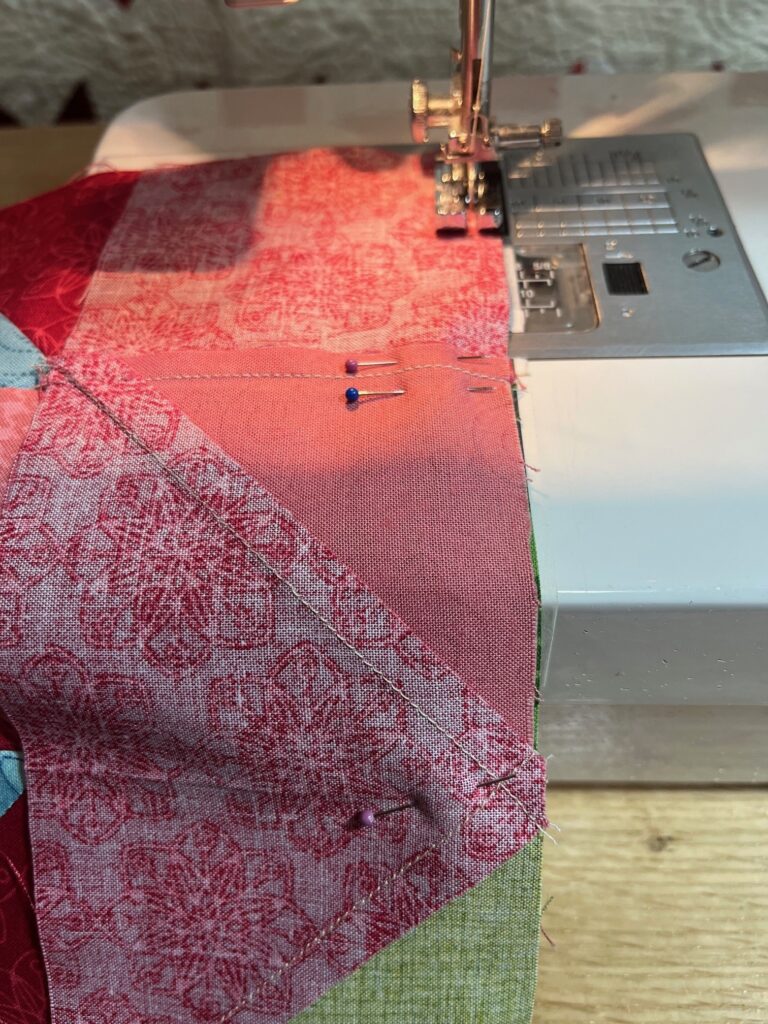
Place a 3 1/2” colored square on the left side of a 3 1/2” x 6 1/2″ red strip, right sides together and diagonal line pointing down to the left corner. Beginning in the middle of the red strip (rather than on the corner) sew on the line down to the corner to connect these two pieces.

Open the colored corner toward the outside corner, matching it to the red corner. Press open. Then trim the two bottom layers (the other colored half and the red corner) of the unit 1/4” from the seam. Repeat for all 4 red strips with the other three colors of 3 1/2” squares.


Plan out the arrangement of the other 3 1/2” colored squares so two of the same colors aren’t on the same flying geese unit.
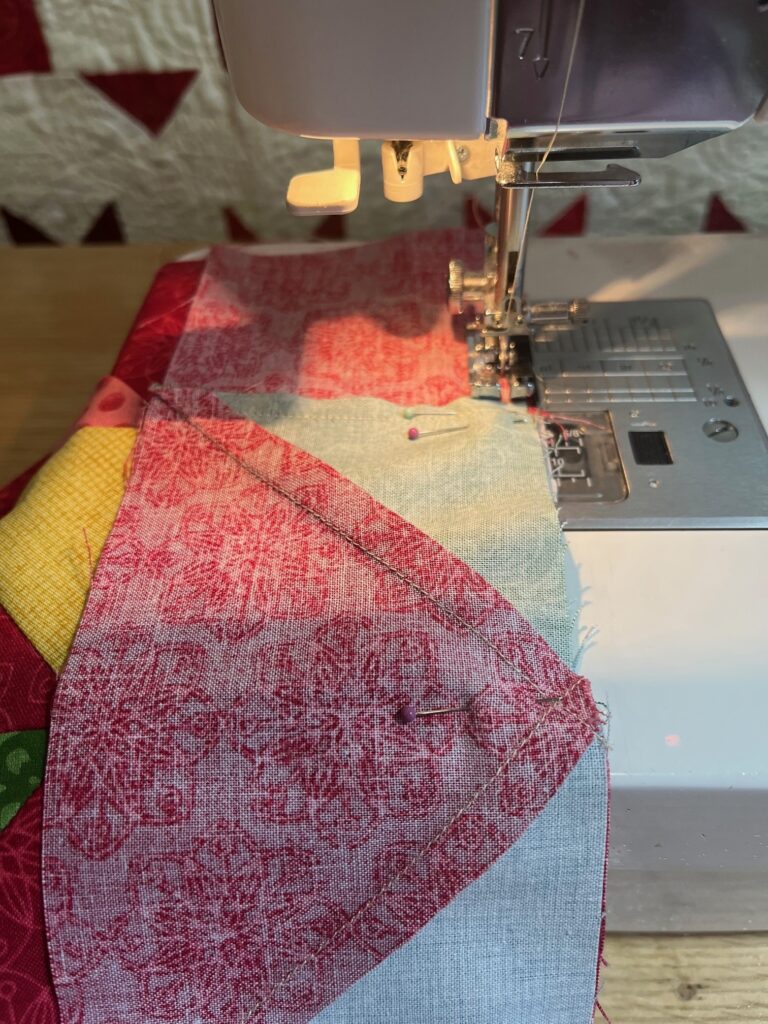
Place a different colored 3 1/2” square on the right side of one of the half-completed flying geese units. Place it right sides together with the diagonal line pointing down to the right corner this time. Beginning in the middle of the red strip (rather than on the corner) sew on the line down to the right corner to connect these two pieces.
Open the colored corner toward the outside corner, matching it to the red corner. Press open. Then trim the two bottom layers (the other colored half and the red corner) of the unit 1/4” from the seam. Repeat for all 4 flying geese units with the other three colors of 3 1/2” squares.

These flying geese units should measure 3 1/2″ x 6 1/2″.
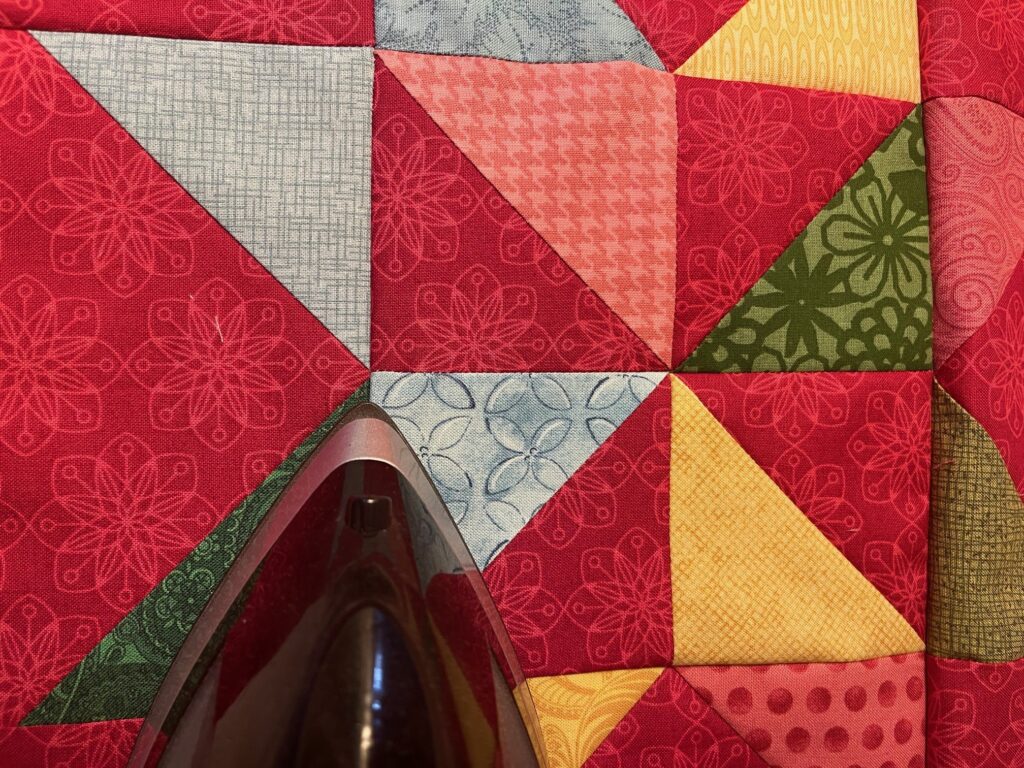
Finish the Pinwheel Star Block
Lay out the four flying geese units around the 6 1/2″ pinwheel block, with the points of the flying geese pointing outward to form the shape of the outside star.
Place a 3 1/2” red square in each corner.

Sew the 3 1/2” red corner squares to each side of the top and the bottom flying geese units. Press seams toward red corner squares. These will be the top and bottom rows of the block.

Sew a flying geese unit to each side of the 6 1/2″ center pinwheel. Press seams toward center. This is your middle row.

Now that you have the three rows sew them to each other for form the 12 1/2″ x 12 1/2″ pinwheel star block. Press seams open.
Trim the block, if necessary.
I like to use the 12 1/2” square Omnigrid Plastic Ruler to accomplish this task!

This little pinwheel star 12 1/2″ block for the Starry + Bright Christmas Pillow is so cute!
Sew the Borders onto the Pinwheel Star Block for the Starry + Bright Christmas Pillow Pattern
Using the other 3 1/2″ colored squares and the 3 1/2″ x 12 1/2″ red strips let’s sew on the borders!
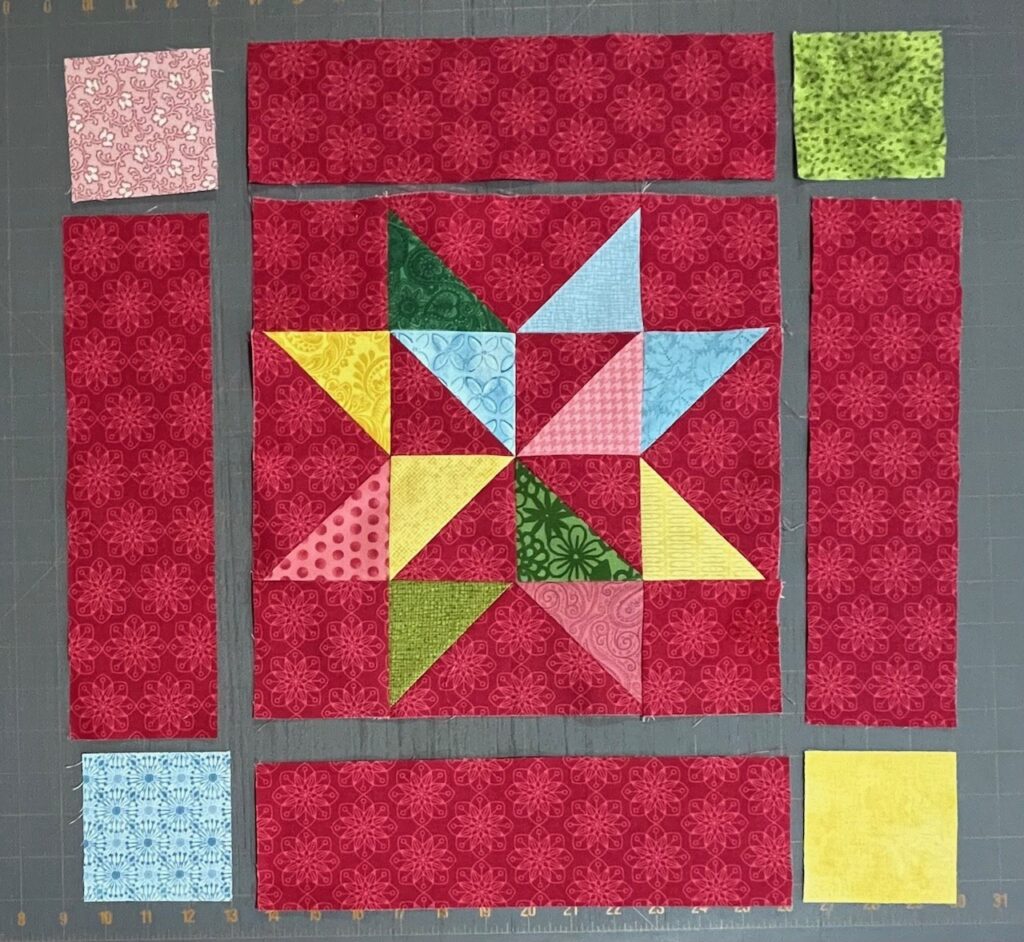
Sew a 3 1/2″ x 12 1/2″ red strip to the right and left sides of the pinwheel star block. Press seams toward red fabric.

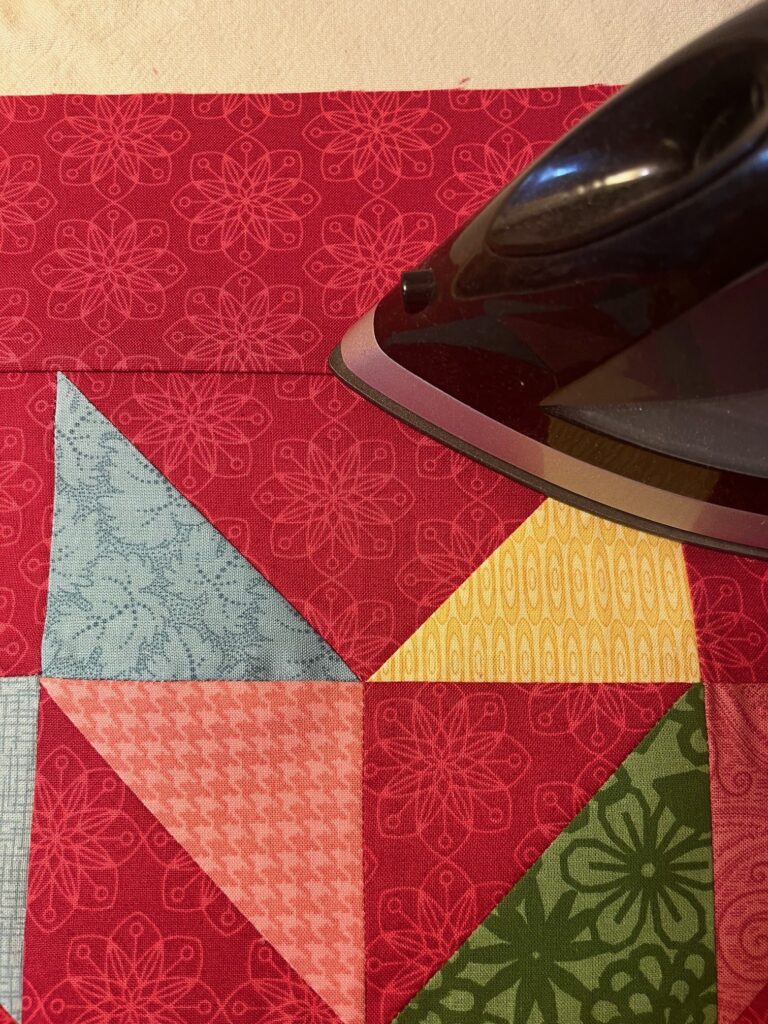
Next, sew a colored square to each side of the other two 3 1/2″ x 12 1/2″ red strips. Press seams toward red fabric.
Sew these longer strips to the top and bottom of the unit to finish off the pillow top. Press seams toward red borders.


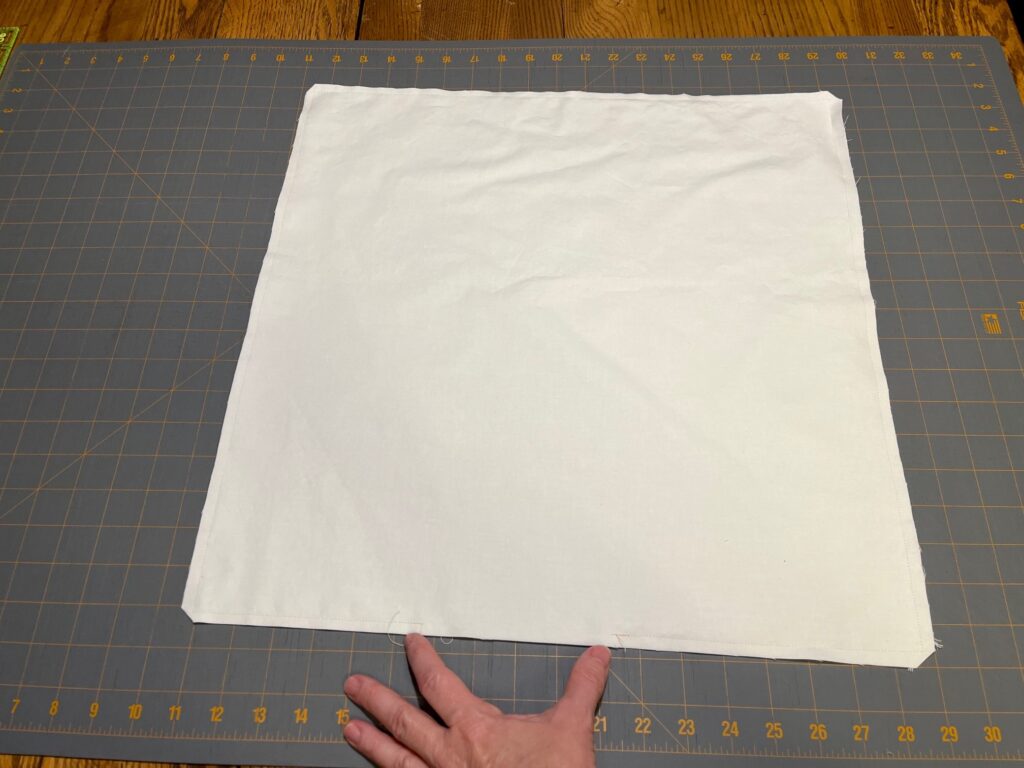
Layering the Top, Batting, and Back
I refer to layering the quilt as “sandwiching”. You need to sandwich the top and back with the batting in the middle for the Starry + Bright Christmas Pillow.
Tape the Backing Down
On a hard surface use painter’s tape to tape down the backing fabric. As you tape the back down you’ll want to make sure the fabric is smooth, without wrinkles. Also, make sure the right side of the fabric is facing down!
Add the Batting
Lay the batting on top of the taped-down quilt back, and move your hands across it to smooth it all over. This will get rid of any wrinkles in the batting, and help to adhere it to the backing fabric.
Place the Quilt Top
Once you have the batting placed on top of the quilt back, center the quilt top over the two bottom layers. Right side facing up, of course! The two bottom layers of the quilt (the back and the batting) should extend about 2” all around the outside edges of the quilt top.
Move your hands across the quilt top to smooth it all over, and help remove any wrinkles. This will also help adhere the quilt top to the batting a little bit.
Baste the Layers
You can either spray baste your quilt layers or pin them together with 1 1/2” stainless pins. Place pins around the entire quilt every 4-5 inches so the three layers don’t move around when you’re machine quilting this project. Again, make sure all wrinkles are smoothed out. Adjust basting if needed to remove any wrinkles.


“Quilting” the Pillow Top
Use whatever free-motion stitch you’d like, or use a straight stitch to quilt in the ditches or along the seams. You’ll need a darning foot to free-motion quilt. And you’ll need to either be able to lower the feed dogs on the machine. Or place a special cover over them. If you’re using a straight stitch to machine quilt you’ll need a walking foot.


Sewing the Quilted Pillow Cover
Once you’ve quilted the pillow top, sew the back pieces on to make it into an envelope pillow cover.
For each of the 2 – 12 1/2” x 18 1/2” pieces, fold one right side of the 18 1/2” side under 1/4” and press. Fold under again 1/4″. Press, and stitch along the inside of the folded side to create a 1/4” hem.

Place the “unhemmed” side of each of these two units along the opposite edges of the quilt top. Right sides together with the right side of the quilt top. So that the hemmed edges of the backing units overlap each other in the center.
Pin in place all around each edge and stitch 1/4” around all of the outside edges to sew the backing in place, removing pins as you sew up to them. Trim corners a little bit.


Trim 1/4″ all the way around the outside edges.

Turn right side out. Carefully use the blunt end of a wooden skewer or the end of a small paintbrush to push the corners right side out.


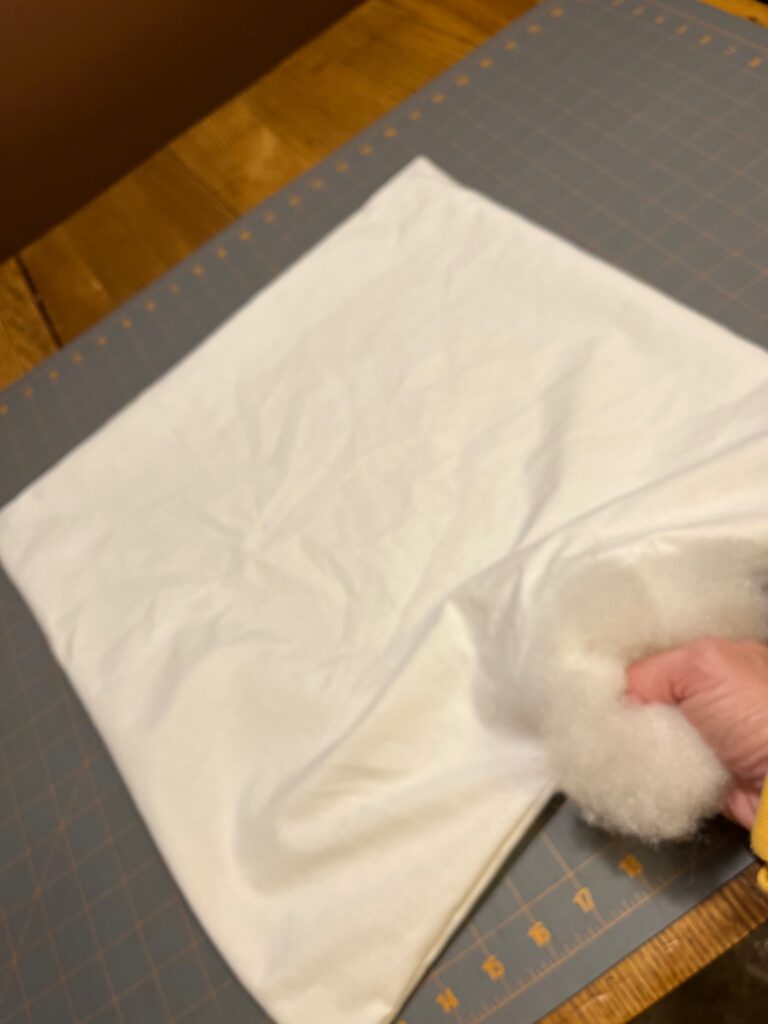
Sewing the Pillow Form Insert
Place the 2 – 18 1/2” squares of muslin together, pin, and stitch around the edges 1/4” removing pins as you come up to them. Leave a 5” opening on one side. Turn the insert right side out. Stuff with about 1 pound of Poly-fil. Turn the opening under and pin edges together. Sew the opening shut using about a 1/4” seam allowance, remove pins as you come to them. Plumb pillow insert to remove lumps. Easy peasy!


Stuff the quilted pillow cover with the 18” pillow form insert. Here is a link to directions on how to make the pillow insert!!
Enjoy!!
Click Here to make the coordinating Merry + Bright Christmas Pillow!!