
Half square triangles are one of the most versatile building blocks in quilting.
And making them 8 at a time can save you time, fabric, and energy!!
In this tutorial, I’ll walk you through how to make 8-at-a-time HSTs with easy, beginner-friendly steps.
We’ll go over cutting directions for 3 1/2″ unfinished HSTs.
I’ll also share common blocks that use 8 HSTs and some fun quilt patterns from my LAKEGIRLQUILTS Etsy shop that use them too!
Let’s dive in!
Post contains affiliate links and we earn commissions if you shop through the links on this page, including Amazon Associate links. For more information please read the disclaimer on the Privacy Policy page.
Why Make 8 Half Square Triangles at a Time?
Making 8 HSTs at once is a huge time-saver. Instead of cutting and sewing each triangle individually, you can work smarter with one square of fabric. It’s especially handy when your quilt pattern calls for a bunch of matching HSTs.
This method also keeps things more accurate. You’re sewing on the grain line and trimming later, which makes it easier to get clean points and consistent sizing.
Plus, it’s just fun. Watching your single fabric square turn into eight neat little HSTs feels a bit like magic.
Tools You’ll Need to Make 8-at-a-Time Half Square Triangles
You don’t need any fancy equipment to make 8-at-a-time HSTs. But having a few helpful tools can make the process smoother, more accurate, and a lot more fun.

Rotary cutter – This tool makes clean, accurate cuts through fabric. Be sure your blade is sharp for the best results.
Cutting mat – A self-healing cutting mat protects your surface and helps you line up your fabric with measurement guides.
Quilting ruler – A square ruler (at least 6 1/2″) is perfect for trimming your HSTs. Look for one with a 45-degree line to match your seam.
Fabric marking tool – You’ll need to draw diagonal lines across your fabric. A chalk pencil, water-soluble pen, or even a regular or mechanical pencil works fine.
Sewing machine with a 1/4″ foot – A quarter-inch seam foot helps you sew consistent seams, which is key for accurate piecing.
Iron and pressing surface – Pressing your seams flat makes trimming easier and your blocks more precise. A hot, dry iron works best for this step.
Thread and pins (optional) – Use a neutral thread color for piecing. If your fabric is slippery or stretchy, a few pins can help hold everything in place.
If you’re a newer quilter, don’t worry—you can absolutely make these HSTs with just the basics. But once you have these tools on hand, you’ll be ready to make crisp, clean half square triangles every time!
I’ve got a whole post on Basic Quilting Tools, check it out here!
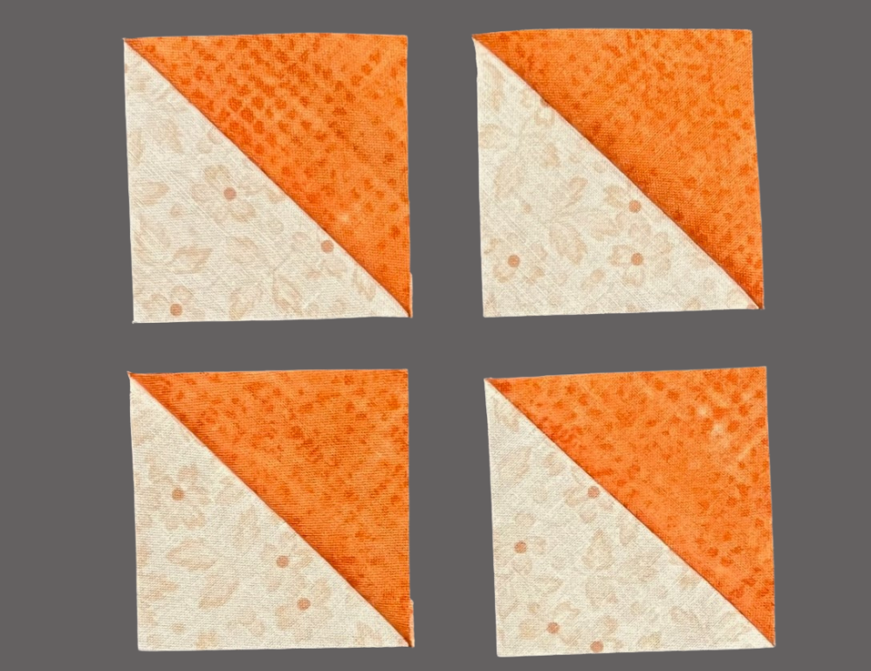
Cutting Directions for 3 1/2″ Unfinished HSTs
To make eight 3 1/2″ unfinished HSTs, start with two squares of fabric that are each 8″ x 8″.
One square should be your light fabric and the other your dark or contrasting fabric.

This will give you eight 3 1/2″ squares after trimming. Once sewn into a quilt, they’ll finish at 3″ x 3″.
Want to make other sizes? I’ve got you covered with a downloadable HST size chart linked further down in this post. It includes cutting measurements for many popular sizes.
Step-by-Step Instructions
Follow these easy steps to make 8-at-a-time half square triangles.
1. Place your squares right sides together.
Make sure the corners are aligned.
2. Draw two diagonal lines across the square.
Use a pencil or chalk to draw one diagonal from corner to corner. Then draw another diagonal line in the opposite direction to form an “X.”
Pin the two squares together along the diagonal lines.


3. Sew a seam 1/4″ away from both sides of each line.
You’ll end up sewing four seams total—two on each diagonal.


4. Cut the square into quarters.
Use your rotary cutter to slice vertically and horizontally through the center of the square. You’ll now have four smaller squares.
5. Cut each small square on the diagonal line.
You now have eight triangles. Each one is sewn and ready to press.


6. Press the seams.
Open each triangle and press the seam toward the darker fabric or open, depending on your preference.


7. Trim your HSTs to 3 1/2″.
Use a square ruler and line up the diagonal seam with the 45-degree line on your ruler for accuracy.


Done! You now have eight perfectly matched HSTs.

Helpful Tips for Accuracy
Use a scant 1/4″ seam. This gives you a little extra room to trim without losing points. A scant 1/4” seam is just a few thread widths smaller than 1/4″.
Don’t skip trimming. It may seem like an extra step, but it makes your final quilt top so much neater.
Press before you trim. A flat seam gives you more accurate trimming lines. Press seam toward the darker fabric. Use pressing spray like FLATTER by SOAK Co. to help your seams lay nice and flat! You can order FLATTER here! It comes unscented or in all kinds of fun scents. My favorite is “Celebration” scent!! It’s the pink bottle.
Chain piece your squares. If you’re making a bunch, this saves time and thread.
Starch your fabric before cutting. This helps prevent stretching along the bias.
Common Quilt Blocks That Use 8 HSTs
You’ll be amazed how often eight HSTs show up in quilt blocks. My Easy Pinwheel Block is made with HSTs! If you’re making several pinwheels you can use the 8-at-a-time HST method to crank them out!!

Here are a few other popular examples:


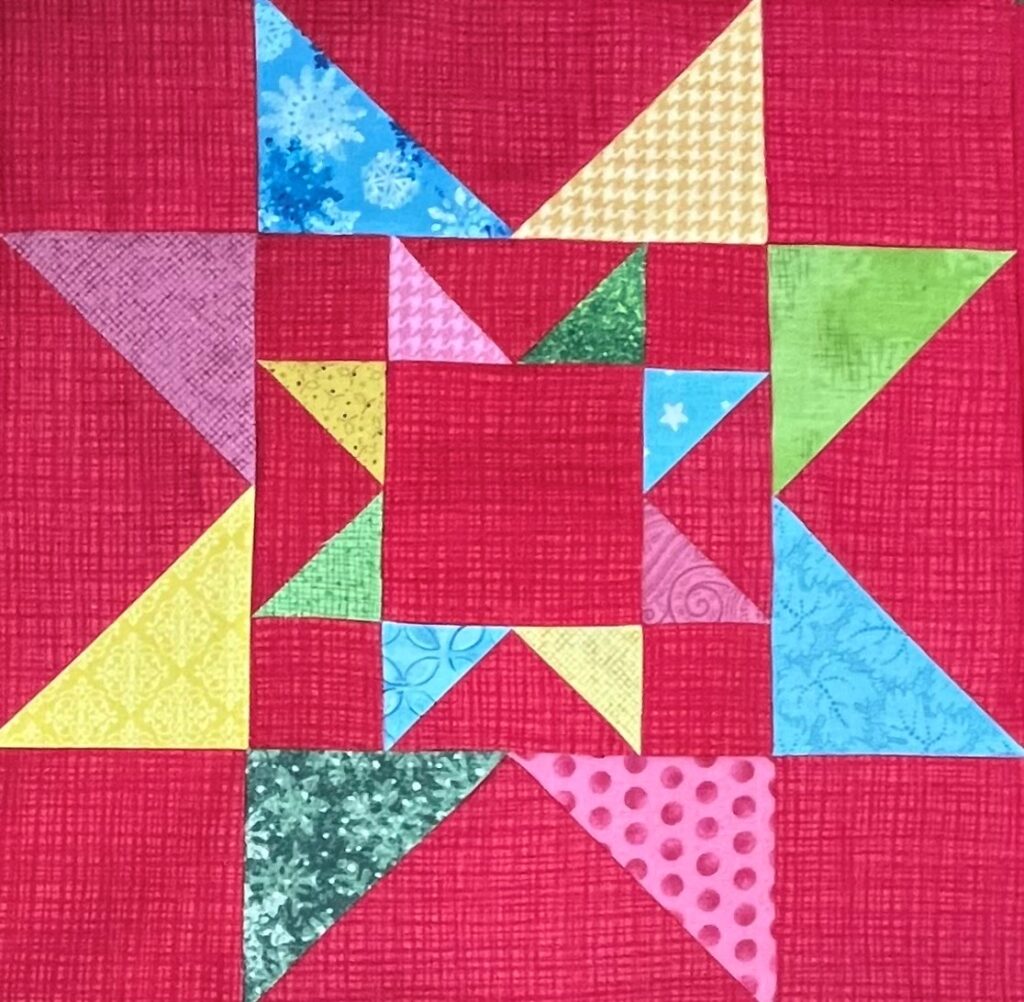

These blocks can use HSTs in fun and creative ways. Once you know how to make them 8 at a time, you can build a block in no time!
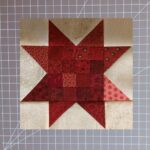
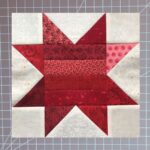
LAKEGIRLQUILTS Patterns That Use HSTs
Many of my quilt patterns at LAKEGIRLQUILTS include HSTs. Here are a few favorites:


Each pattern includes beginner-friendly instructions and pressing guides to help you sew with confidence.
Download Your Free HST Cutting Chart
Want to make HSTs in other sizes? Download my free printable chart with cutting directions for the 8-at-a-time method. It includes finished and unfinished sizes so you can match any block or project.
This chart is perfect to keep by your sewing machine or pin on your inspiration board.
Final Thoughts
Making half square triangles 8 at a time is one of the best tricks in quilting. It saves time, reduces waste, and helps you build blocks faster. With a little practice, this method will become second nature.
Try using this method in your next quilt. Choose a pattern with HSTs, pick your favorite fabrics, and enjoy the rhythm of sewing up these classic little units.
Happy quilting!
You’re the best! Thanks for all the great tips
Aww, you’re very welcome!